
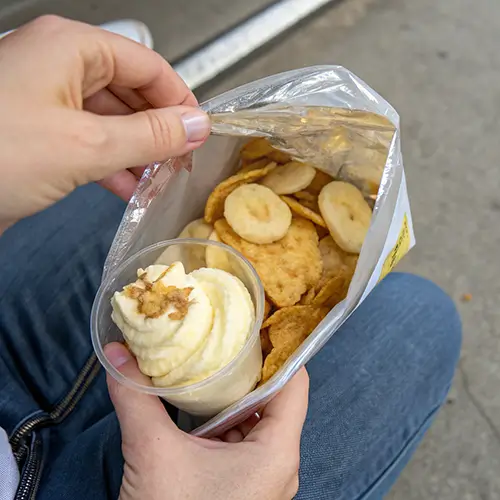
Walking Banana Pudding is a fun, portable dessert that combines creamy pudding, fresh banana slices, and crunchy vanilla wafers in a grab-and-go bag. Perfect for parties, picnics, or movie nights, this easy treat brings classic banana pudding flavor in a handheld form. With just a few simple steps, you can mix, fill, and serve a sweet snack that’s both nostalgic and playful. Walking Banana Pudding is a crowd-pleaser that delivers creamy, crunchy, and fruity bites anywhere you go.
Table of Contents
Why You’ll Love This Walking Banana Pudding
- Perfectly portable for on-the-go snacking.
- Customizable with different pudding flavors.
- Quick and easy to prepare in just minutes.
- Deliciously combines creamy, crunchy, and fruity textures.
- Great for kids and adults alike, making it a family favorite!
Walking Banana Pudding
Ingredients
Equipment
Method
- Step 1: In a medium mixing bowl, combine the pudding mix and milk. Stir well and allow the pudding to set for 5 minutes.
- Step 2: Cut open the tops of the vanilla wafer bags and fold back the edges to create a little bowl.
- Step 3: Spoon the prepared pudding into each wafer bag, filling them generously.
- Step 4: Add sliced banana to each bag, placing them on top of the pudding.
- Step 5: Finish with a dollop of cool whip on top of each bag and serve immediately for a delightful treat!
Notes
| Nutrient | Amount per Serving |
|---|---|
| Calories | 200 |
| Fat | 8g |
| Protein | 2g |
| Carbs | 30g |
Ingredients
Here are the delicious ingredients you’ll need for your Walking Banana Pudding!
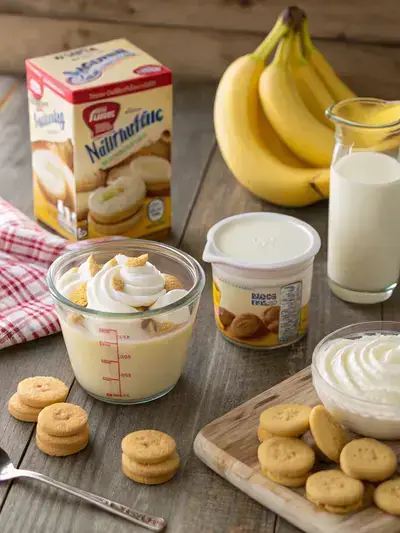
- 5.1 ounces – box instant banana pudding
- 2 cups – milk
- 8 packages – single serving mini vanilla wafers
- 1 – banana sliced
- 8 ounces – tub cool whip
How to Make Walking Banana Pudding
Preparation time is just 5 minutes, with no cooking required. Enjoy this delightful treat immediately for the best crunch!
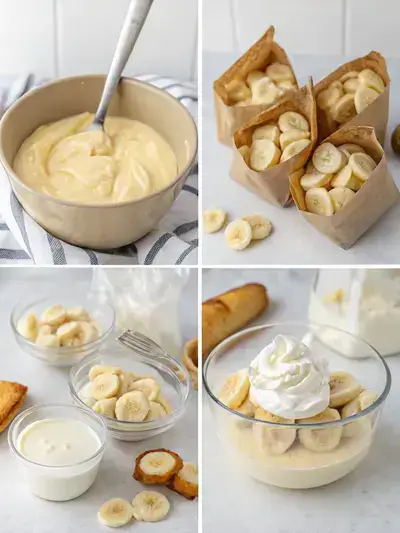
Step 1: Combine Pudding and Milk
In a medium mixing bowl, combine the pudding mix and milk. Stir well and allow the pudding to set for 5 minutes.
Step 2: Prepare Wafer Bags
Cut open the tops of the vanilla wafer bags and fold back the edges to create a little bowl.
Step 3: Fill with Pudding
Spoon the prepared pudding into each wafer bag, filling them generously.
Step 4: Add Bananas
Add sliced banana to each bag, placing them on top of the pudding.
Step 5: Top with Cool Whip
Finish with a dollop of cool whip on top of each bag and serve immediately for a delightful treat!
Recipe Snapshot
| Feature | Details |
|---|---|
| Category | Dessert |
| Cuisine | American |
| Prep Time | 5 minutes |
| Cook Time | 0 minutes |
| Extra Time | 0 minutes |
| Total Time | 5 minutes |
| Dietary | Vegetarian |
| Serves | 8 |
| Best Served | Chilled and ready to enjoy! |
Pro Tips for Making Walking Banana Pudding
- Use ripe bananas for extra sweetness.
- Make the layers even for better presentation.
- Use a cold metal bowl to whip ingredients more quickly.
- Garnish just before serving to keep it fresh.
How to Serve this Walking Banana Pudding
- Perfect for picnics or road trips—grab and go!
- Pair with fresh berries for a fruity twist.
- Top with a sprinkle of crushed nuts for added crunch.
- Serve alongside a scoop of vanilla ice cream for extra indulgence.
- Great for birthday parties—let kids customize their own bags!
- Enjoy as a fun dessert at family gatherings or BBQs.
Make Ahead and Storage
You can make this Walking Banana Pudding ahead and store it easily:
Storing Walking Banana Pudding Leftovers
- Store leftovers in an airtight container.
- Keep in the refrigerator for up to 2 days.
- Separate the wafers if possible to maintain crunchiness.
Freezing Walking Banana Pudding
- Assemble without wafers for freezing.
- Place pudding and bananas in a freezer-safe container.
- Seal tightly and freeze for up to 1 month.
Reheating Walking Banana Pudding
- Thaw in the refrigerator overnight before serving.
- Do not reheat; serve chilled for best taste.
- Add fresh wafers just before serving for crunch.
Explore more easy breakfast recipes, quick lunch ideas, cozy dinner meals, tasty snacks, and delightful dessert.
FAQs
Here’s a helpful FAQ about this recipe:
1. Can I make these with the mini teddy graham bags?
Yes, it will change the flavor, but if your store only carries those, you could use those. Just keep in mind that the taste will be different from the classic banana pudding experience!
2. Can this be made with another type of instant pudding?
Absolutely! A classic banana pudding is typically made with vanilla, but you can switch it up and use chocolate pudding for a delicious chocolate-covered banana flavor. It’s a fun twist!
3. Is there any way to put these together without making instant pudding?
Yes! If you’re camping or on the go, you can skip the mixing bowls and use vanilla pudding cups instead. They make for a convenient and tasty base!
4. Can these be made up ahead of time?
Yes, but keep in mind that the vanilla wafers will soften over time, giving you a more traditional banana pudding texture. For that crunchy on-the-go texture, it’s best to assemble them just before serving!
Final Thoughts
Get ready to indulge in the delightful charm of Walking Banana Pudding! This simple, fun treat is perfect for any occasion, bringing back sweet memories with every bite. So grab your ingredients, whip it up, and enjoy the smiles it brings. It’s a rewarding snack that’s sure to be a hit with friends and family!