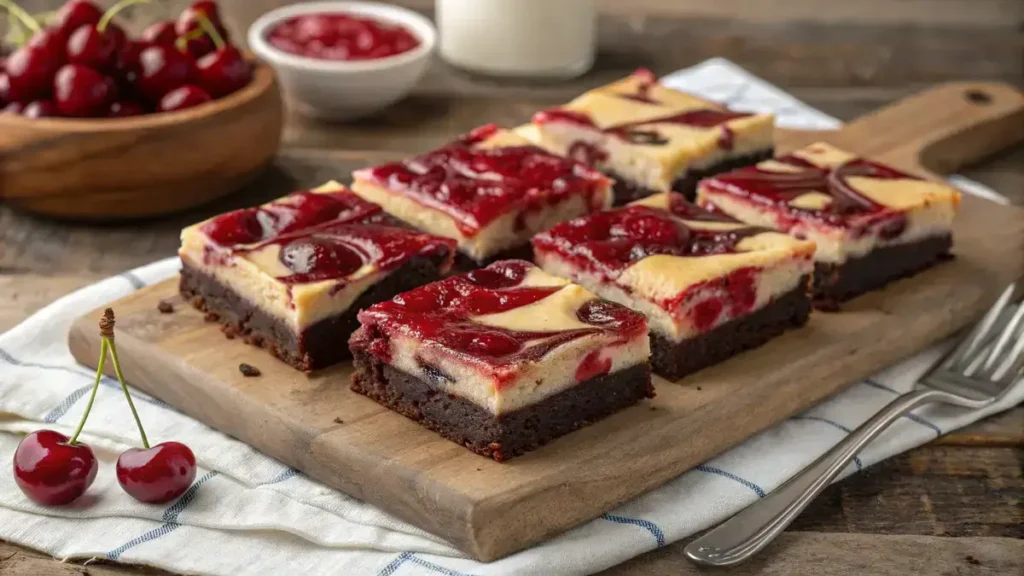
Cherry Cheesecake Brownies combine rich, fudgy chocolate layers with a smooth cream cheese swirl and bursts of bright cherry flavor for a perfectly balanced treat. Deep cocoa notes meet tangy cream cheese, while juicy cherries, a touch of vanilla, and a splash of cherry juice add natural sweetness without any alcohol. Each bite delivers a cozy mix of sweet and tart, making these Cherry Cheesecake Brownies ideal for sharing, gifting, or savoring as a comforting homemade dessert.
Table of Contents
Why You’ll Love This Cherry Cheesecake Brownies
- Decadent layers of rich chocolate and creamy cheesecake.
- Sweet and tart cherry topping for a fruity twist.
- Easy to make, perfect for any occasion.
- Impressive dessert that will wow your friends and family.
- Combines two beloved desserts in one delightful treat!

Cherry Cheesecake Brownies
Ingredients
Equipment
Method
- Preheat your oven to 350°F (175°C). Line an 8×8-inch baking pan with parchment paper for easy removal.
- In a saucepan, melt butter and chocolate chips together over low heat. Stir until smooth and combined.
- Remove from heat and whisk in sugar. Beat in eggs one at a time, followed by the vanilla extract.
- Sift in flour, cocoa powder, and salt. Gently fold until just combined. Don’t overmix!
- In a separate bowl, beat cream cheese, sugar, egg, and vanilla until smooth and creamy.
- Pour half of the brownie batter into the prepared pan. Spread it evenly.
- Dollop the cheesecake mixture on top of the brownie layer. Use a knife to swirl it slightly.
- Pour the remaining brownie batter over the cheesecake layer. Swirl gently with a knife.
- Spoon cherry pie filling over the top. Swirl again for a beautiful finish.
- Bake for 35-40 minutes. The edges should be set, but the center will be slightly jiggly.
- Let the brownies cool completely in the pan. Refrigerate for at least 2 hours before slicing and serving.
Notes
| Nutrient | Amount per Serving |
|---|---|
| Calories | 250 |
| Fat | 15g |
| Protein | 4g |
| Carbs | 30g |
| Sugar | 20g |
Ingredients
Gather these delicious ingredients to create your Cherry Cheesecake Brownies!
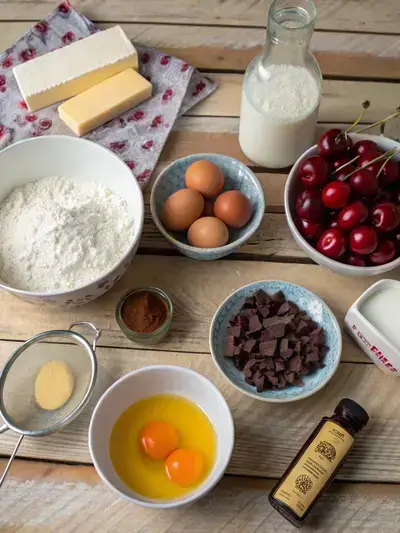
- 1 cup unsalted butter – melted
- 8 oz semisweet chocolate chips – for rich flavor
- 1 ½ cups granulated sugar – for sweetness
- 4 large eggs – binds the ingredients
- 1 tsp vanilla extract – adds depth
- 1 cup all-purpose flour – for structure
- ½ cup cocoa powder – enhances chocolatey taste
- ½ tsp salt – balances sweetness
- 8 oz cream cheese – creamy layer
- ¼ cup granulated sugar – for the cheesecake layer
- 1 large egg – to mix into the cheesecake
- 1 tsp vanilla extract – for the cheesecake flavor
- 1 cup cherry pie filling – fruity topping
How to Make Cherry Cheesecake Brownies
This delightful Cherry Cheesecake Brownies recipe takes about 20 minutes to prepare, 35-40 minutes to bake, and requires at least 2 hours of chilling time before serving. Get ready for a sweet treat!
Step 1: Preheat the Oven
Preheat your oven to 350°F (175°C). Line an 8×8-inch baking pan with parchment paper for easy removal.
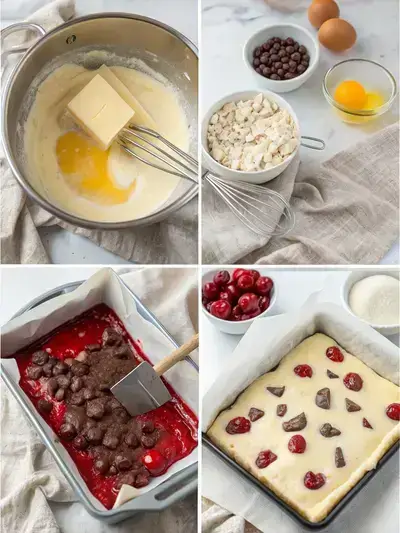
Step 2: Melt Butter and Chocolate
In a saucepan, melt butter and chocolate chips together over low heat. Stir until smooth and combined.
Step 3: Mix in Sugar and Eggs
Remove from heat and whisk in sugar. Beat in eggs one at a time, followed by the vanilla extract.
Step 4: Combine Dry Ingredients
Sift in flour, cocoa powder, and salt. Gently fold until just combined. Don’t overmix!
Step 5: Prepare the Cheesecake Layer
In a separate bowl, beat cream cheese, sugar, egg, and vanilla until smooth and creamy.
Step 6: Layer the Brownie Batter
Pour half of the brownie batter into the prepared pan. Spread it evenly.
Step 7: Add the Cheesecake Mixture
Dollop the cheesecake mixture on top of the brownie layer. Use a knife to swirl it slightly.
Step 8: Finish with Brownie Batter
Pour the remaining brownie batter over the cheesecake layer. Swirl gently with a knife.
Step 9: Add Cherry Filling
Spoon cherry pie filling over the top. Swirl again for a beautiful finish.
Step 10: Bake
Bake for 35-40 minutes. The edges should be set, but the center will be slightly jiggly.
Step 11: Cool and Chill
Let the brownies cool completely in the pan. Refrigerate for at least 2 hours before slicing and serving.
Recipe Snapshot
| Feature | Details |
|---|---|
| Category | Dessert |
| Cuisine | American |
| Prep Time | 20 minutes |
| Cook Time | 40 minutes |
| Extra Time | 120 minutes (chilling) |
| Total Time | 180 minutes |
| Dietary | Vegetarian |
| Serves | 12 |
| Best Served | Chilled and sliced |
Pro Tips for Making Cherry Cheesecake Brownies
- Opt for fresh or frozen cherries for the best flavor.
- Chill the cheesecake layer before adding it to the brownie base.
- Use parchment paper for easy removal and cleanup.
- Experiment with different fruit toppings for variety.
- Let the brownies cool completely for cleaner cuts.
How to Serve this Cherry Cheesecake Brownies
- Serve warm with a scoop of vanilla ice cream on top.
- Drizzle with chocolate or caramel sauce for extra indulgence.
- Pair with fresh whipped cream and a sprinkle of crushed nuts.
- Enjoy with a cup of coffee or a refreshing glass of iced tea.
Make Ahead and Storage
You can make these delightful brownies ahead of time and store them with ease:
Storing Cherry Cheesecake Brownies Leftovers
- Allow brownies to cool completely before storing.
- Place in an airtight container.
- Store in the refrigerator for up to 5 days.
- For best taste, enjoy within the first few days.
Freezing Cherry Cheesecake Brownies
- Wrap brownies tightly in plastic wrap.
- Place wrapped brownies in a freezer-safe bag or container.
- Freeze for up to 3 months for optimal quality.
- Label with the date for easy tracking.
Reheating Cherry Cheesecake Brownies
- Thaw brownies in the refrigerator overnight if frozen.
- Reheat in the microwave for 10-15 seconds.
- For a warm, fresh texture, use the oven at 350°F for 5-10 minutes.
- Enjoy with a dollop of whipped cream or fresh cherries!
Explore more easy breakfast recipes, quick lunch ideas, cozy dinner meals, tasty snacks, and delightful dessert.
FAQs
Here’s a helpful FAQ about this recipe:
1. What ingredients are required to make cherry cheesecake brownies?
To make delicious Cherry Cheesecake Brownies, you will need the following ingredients: for the brownie layer, you’ll need unsweetened cocoa powder, sugar, flour, eggs, butter, and vanilla extract. For the cheesecake layer, gather cream cheese, sugar, an egg, and vanilla extract. Finally, for the cherry layer, you can use cherry pie filling or fresh cherries, depending on your preference. This combination creates a rich and fruity dessert that everyone will love!
2. How do I create a distinct cherry layer in cherry cheesecake brownies?
To create a distinct cherry layer in your Cherry Cheesecake Brownies, simply spread a layer of cherry pie filling or fresh cherries over the cheesecake layer before adding the brownie batter on top. You can also swirl the cherry filling into the cheesecake layer for a marbled effect. This not only enhances the flavor but also adds a beautiful visual appeal to your brownies!
3. Can I use fresh, frozen, or canned cherries in cherry cheesecake brownies?
Absolutely! You can use fresh, frozen, or canned cherries in your Cherry Cheesecake Brownies. If using fresh cherries, make sure to pit and chop them. Frozen cherries should be thawed and drained to avoid excess moisture. Canned cherries are convenient and can be used directly, but be sure to drain them well. Each option will give you a delicious cherry flavor, so choose what you have on hand!
4. How should I store cherry cheesecake brownies to keep them fresh?
To keep your Cherry Cheesecake Brownies fresh, store them in an airtight container at room temperature for up to 3 days. If you want to keep them longer, you can refrigerate them for up to a week. For even longer storage, consider freezing them. Just wrap individual brownies tightly in plastic wrap and place them in a freezer-safe container. When you’re ready to enjoy, simply thaw them at room temperature!
Final Thoughts
Get ready to indulge in the delightful world of Cherry Cheesecake Brownies! This recipe is not just simple; it’s a sweet adventure that brings back memories of family gatherings and sunny afternoons. So grab your ingredients, whip up this treat, and enjoy every gooey, fruity bite. You deserve this delicious moment!