

Valentine cookie magic starts with buttery dough tinted a soft blush pink, rolled out and cut into sweet little hearts. A sprinkle of sugar and a splash of vanilla turn baking into a cozy, love filled moment as warm cookie aromas drift through the kitchen. A touch of almond extract adds rich flavor without anything fancy, keeping each bite simple, sweet, and special. Perfect with hot cocoa or tucked into a gift bag, these charming cookies are made to share and guaranteed to win hearts.
Table of Contents
Why You’ll Love This VALENTINE COOKIE
- Deliciously sweet and buttery, perfect for sharing with loved ones.
- Easy to make, even for baking beginners—no stress, just fun!
- Customizable with your favorite sprinkles or icing for a personal touch.
- Heart-shaped design adds a romantic flair to your Valentine’s Day celebration.

VALENTINE COOKIE
Ingredients
Equipment
Method
- Preheat your oven to 350°F (175°C). This will ensure your cookies bake evenly and come out perfectly.
- In a bowl, cream together the softened butter and granulated sugar until light and fluffy. This step is key for a soft cookie texture!
- Beat in the egg and vanilla extract until everything is well combined. The vanilla adds a lovely aroma!
- In a separate bowl, whisk together the flour, baking powder, and salt. This helps to evenly distribute the leavening agent.
- Gradually add the dry ingredients to the butter mixture, mixing until a soft dough forms. Don’t overmix; just combine until smooth!
- Divide the dough in half, wrap each portion in plastic wrap, and chill in the refrigerator for at least 1 hour. This makes the dough easier to roll out.
- Roll out the chilled dough on a lightly floured surface to about ¼-inch thickness. Keep it even for uniform baking!
- Use heart-shaped cookie cutters to cut out cookies and place them on a parchment-lined baking sheet. Make sure to leave some space between them!
- Bake for 8–10 minutes, or until the edges are just beginning to turn golden. Keep an eye on them to avoid overbaking!
- Let cookies cool completely on a wire rack. This step is crucial for perfect icing application!
- If desired, prepare royal icing, tint portions with red and pink food coloring, pipe decorations onto cooled cookies, and finish with heart-shaped sprinkles. Allow icing to set before serving.
Notes
| Nutrient | Amount per Serving |
|---|---|
| Calories | 150 |
| Fat | 7g |
| Protein | 2g |
| Carbohydrates | 22g |
| Sugar | 10g |
| Fiber | 0g |
Ingredients
Get ready to bake some delightful Valentine cookies that are sure to impress!
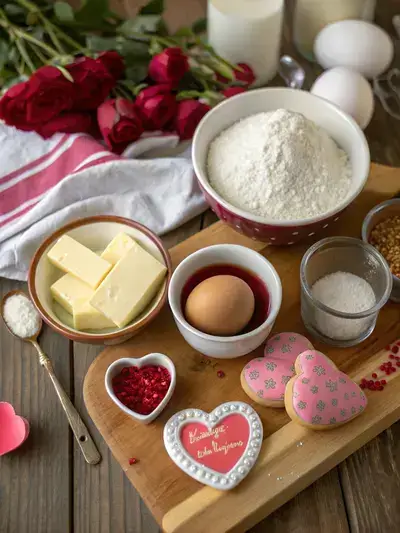
- 1 cup unsalted butter – softened for easier mixing
- 1 cup granulated sugar – adds sweetness
- 1 large egg – binds the ingredients
- 1 teaspoon vanilla extract – enhances flavor
- 2½ cups all-purpose flour – forms the base of the cookies
- 1 teaspoon baking powder – helps cookies rise
- ¼ teaspoon salt – balances flavors
- Royal icing (optional) – for decorating
- Red and pink food coloring – for a festive touch
- Heart-shaped sprinkles – perfect for decorating
How to Make VALENTINE COOKIE
Get ready to spread some love with these delightful heart-shaped Valentine cookies! With a preparation time of 1 hour, a cooking time of 8–10 minutes, and a chilling time of at least 1 hour, these cookies are perfect for sharing with your special someone.

Step 1: Preheat the Oven
Preheat your oven to 350°F (175°C). This will ensure your cookies bake evenly and come out perfectly.
Step 2: Cream the Butter and Sugar
In a bowl, cream together the softened butter and granulated sugar until light and fluffy. This step is key for a soft cookie texture!
Step 3: Add Egg and Vanilla
Beat in the egg and vanilla extract until everything is well combined. The vanilla adds a lovely aroma!
Step 4: Mix Dry Ingredients
In a separate bowl, whisk together the flour, baking powder, and salt. This helps to evenly distribute the leavening agent.
Step 5: Combine Mixtures
Gradually add the dry ingredients to the butter mixture, mixing until a soft dough forms. Don’t overmix; just combine until smooth!
Step 6: Chill the Dough
Divide the dough in half, wrap each portion in plastic wrap, and chill in the refrigerator for at least 1 hour. This makes the dough easier to roll out.
Step 7: Roll Out the Dough
Roll out the chilled dough on a lightly floured surface to about ¼-inch thickness. Keep it even for uniform baking!
Step 8: Cut Out Cookies
Use heart-shaped cookie cutters to cut out cookies and place them on a parchment-lined baking sheet. Make sure to leave some space between them!
Step 9: Bake the Cookies
Bake for 8–10 minutes, or until the edges are just beginning to turn golden. Keep an eye on them to avoid overbaking!
Step 10: Cool the Cookies
Let cookies cool completely on a wire rack. This step is crucial for perfect icing application!
Step 11: Decorate (Optional)
If desired, prepare royal icing, tint portions with red and pink food coloring, pipe decorations onto cooled cookies, and finish with heart-shaped sprinkles. Allow icing to set before serving.
Recipe Snapshot
| Feature | Details |
|---|---|
| Category | Dessert |
| Cuisine | American |
| Prep Time | 60 minutes |
| Cook Time | 10 minutes |
| Extra Time | 60 minutes (resting) |
| Total Time | 130 minutes |
| Dietary | Vegetarian |
| Serves | 24 |
| Best Served | With love on Valentine’s Day! |
Pro Tips for Making VALENTINE COOKIE
- Chill your dough for at least 30 minutes for easier rolling.
- Use a heart-shaped cookie cutter for perfect shapes.
- Experiment with different icing colors for a festive touch.
- Let cookies cool completely before decorating to prevent melting.
- Store in an airtight container to keep them fresh longer.
How to Serve this VALENTINE COOKIE
- Serve with a glass of almond milk for a nutty twist.
- Pair with fresh strawberries for a fruity contrast.
- Top with a drizzle of white chocolate for extra sweetness.
- Enjoy alongside a scoop of vanilla ice cream for a delightful dessert.
Make Ahead and Storage
Keep your Valentine cookies fresh and delicious with these simple storage tips:
Storing VALENTINE COOKIE Leftovers
- Allow cookies to cool completely before storing.
- Place in an airtight container to maintain freshness.
- Store at room temperature for up to one week.
- For longer storage, consider freezing.
Freezing VALENTINE COOKIE
- Wrap each cookie individually in plastic wrap.
- Place wrapped cookies in a freezer-safe bag or container.
- Label with the date for easy reference.
- Cookies can be frozen for up to three months.
Reheating VALENTINE COOKIE
- Preheat your oven to 350°F (175°C).
- Place cookies on a baking sheet lined with parchment paper.
- Heat for about 5-7 minutes until warm.
- Enjoy the fresh-baked taste and aroma!
Explore more easy breakfast recipes, quick lunch ideas, cozy dinner meals, tasty snacks, and delightful dessert.
FAQs
Here’s a helpful FAQ about this recipe:
1. What are Taylor Swift’s cookies called?
Taylor Swift’s cookies are famously known as ‘Taylor’s Cookies.’ They gained popularity due to her love for baking and sharing her recipes with fans. These cookies often feature unique flavors and fun shapes, making them a delightful treat for any occasion, including Valentine’s Day!
2. What are popular Valentine’s cookie flavors?
Popular Valentine’s cookie flavors include classic options like chocolate chip, sugar cookies, and red velvet. You can also find delightful variations such as raspberry almond, vanilla bean, and even fun flavors like strawberry shortcake. These flavors not only taste great but also add a romantic touch to your Valentine’s Day celebrations!
3. What’s the most romantic dessert?
The most romantic dessert is often considered to be chocolate fondue, as it encourages sharing and intimacy. However, heart-shaped cookies, especially when decorated with love, can also be incredibly romantic. They symbolize affection and are perfect for expressing your feelings on Valentine’s Day!
4. Does Costco have Valentine cookies?
Yes, Costco typically offers a variety of Valentine cookies during the season. You can find beautifully decorated cookies in heart shapes, often packaged in festive boxes. These cookies are perfect for sharing with loved ones or bringing to a Valentine’s Day gathering!
Final Thoughts
We hope you’re as excited to bake these delightful heart-shaped Valentine cookies as we are! They’re not just easy to make, but they also bring a sprinkle of love to your day. So gather your loved ones, roll out that dough, and enjoy the sweet rewards of your efforts. Happy baking!