

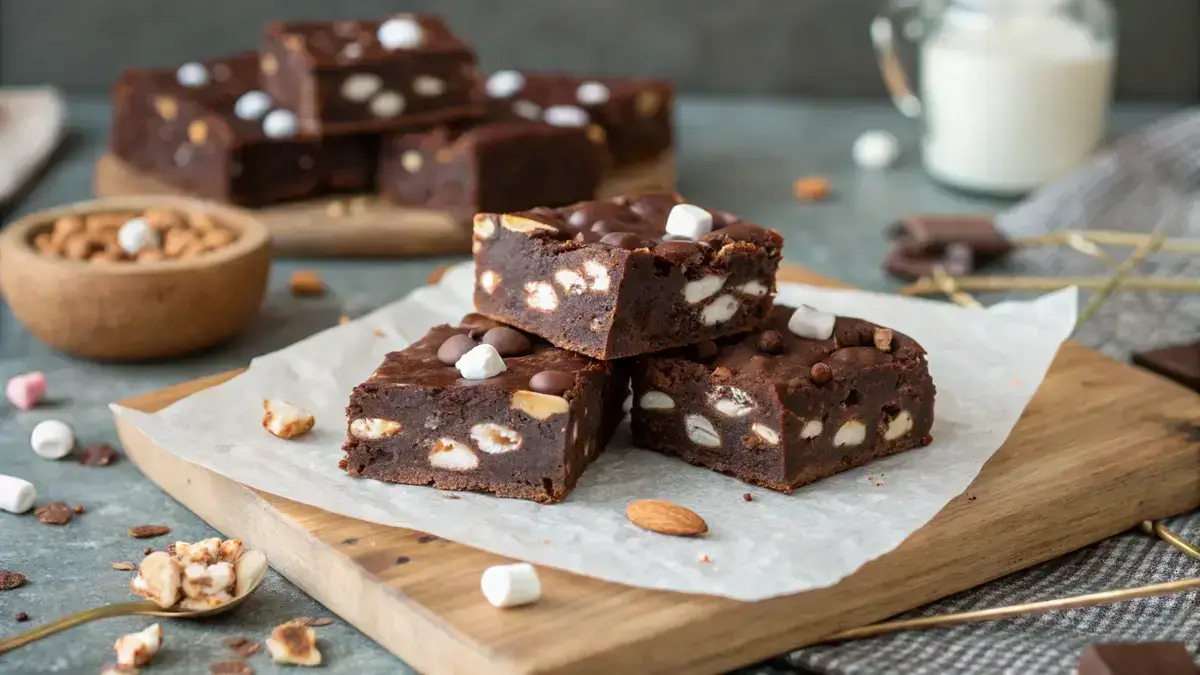
Recipe card
Print / PDFRocky Road Fudge
Rate this recipe
Be the first to rate
- Prep Time
- 15 mins
- refrigerating
- 2 hrs
- Total Time
- 2 hrs 15 mins
Ingredients
- 2 cups semisweet chocolate chips (for a rich, chocolatey base)
- 1 14 oz can sweetened condensed milk (brings creaminess and sweetness)
- 2 tbsp unsalted butter (adds smoothness)
- 1 tsp vanilla extract (for extra flavor)
- 1/4 tsp salt (enhances the chocolate taste)
- 1 cup mini marshmallows (for that classic Rocky Road touch)
- 1/2 cup chopped nuts (walnuts or almonds) (adds crunch and texture)
Equipment
- 1 8×8-inch pan — For setting the fudge
- 1 Medium saucepan — For melting the chocolate mixture
- 1 Spatula — For spreading the fudge mixture
Method
- 1
Step 1: Line the Pan – Start by lining an 8×8-inch pan with parchment paper. This will make it super easy to lift out your fudge later!
- 2
Step 2: Melt the Mixture – In a medium saucepan over low heat, combine chocolate chips, sweetened condensed milk, and butter. Stir constantly until the mixture is smooth and creamy.
- 3
Step 3: Add Flavor – Remove the saucepan from heat. Stir in vanilla extract and a pinch of salt for that extra flavor boost!
- 4
Step 4: Fold in the Goodies – Gently fold in the mini marshmallows and chopped nuts. This is where the magic happens!
- 5
Step 5: Pour and Spread – Pour the fudge mixture into the prepared pan. Use a spatula to spread it evenly.
- 6
Step 6: Chill Out – Refrigerate the fudge for at least 2 hours or until it’s firm. Patience is key!
- 7
Step 7: Cut and Serve – Once firm, lift the fudge out of the pan using the parchment paper. Cut into squares and serve chilled. Enjoy your delicious ROCKY ROAD FUDGE!
Notes
| Nutrient | Amount per Serving |
|---|---|
| Nutrition Facts | Per Serving |
| Calories | 150 |
| Fat | 8g |
| Protein | 2g |
| Carbs | 20g |
Why You’ll Love This ROCKY ROAD FUDGE
- Decadent chocolatey goodness in every bite.
- Loaded with marshmallows and nuts for that perfect crunch.
- Quick and easy to make, perfect for any occasion.
- Customizable with your favorite mix-ins for a personal touch.
Ingredients
Get ready to create a delightful treat with this easy Rocky Road Fudge recipe!
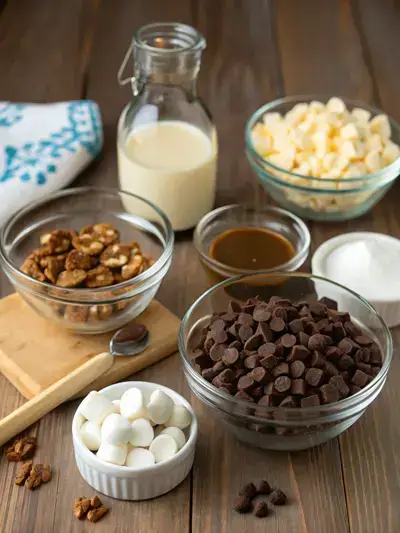
- 2 cups semisweet chocolate chips – for a rich, chocolatey base
- 1 (14 oz) can sweetened condensed milk – brings creaminess and sweetness
- 2 tbsp unsalted butter – adds smoothness
- 1 tsp vanilla extract – for extra flavor
- 1/4 tsp salt – enhances the chocolate taste
- 1 cup mini marshmallows – for that classic Rocky Road touch
- 1/2 cup chopped nuts (walnuts or almonds) – adds crunch and texture
How to Make ROCKY ROAD FUDGE
Get ready to indulge in some deliciously rich ROCKY ROAD FUDGE! This delightful treat takes about 15 minutes to prepare, requires no baking, and needs a chilling time of at least 2 hours to set perfectly. Let’s dive into the fun!
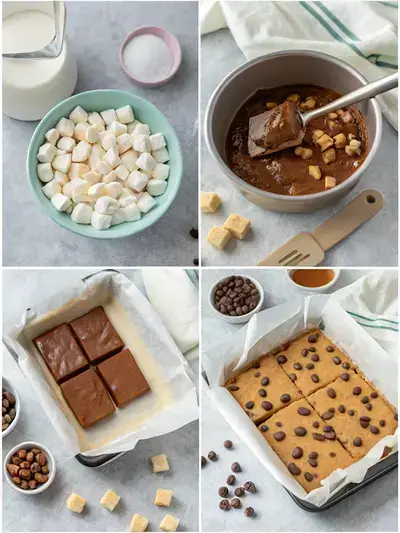
Step 1: Line the Pan
Start by lining an 8×8-inch pan with parchment paper. This will make it super easy to lift out your fudge later!
Step 2: Melt the Mixture
In a medium saucepan over low heat, combine chocolate chips, sweetened condensed milk, and butter. Stir constantly until the mixture is smooth and creamy.
Step 3: Add Flavor
Remove the saucepan from heat. Stir in vanilla extract and a pinch of salt for that extra flavor boost!
Step 4: Fold in the Goodies
Gently fold in the mini marshmallows and chopped nuts. This is where the magic happens!
Step 5: Pour and Spread
Pour the fudge mixture into the prepared pan. Use a spatula to spread it evenly.
Step 6: Chill Out
Refrigerate the fudge for at least 2 hours or until it’s firm. Patience is key!
Step 7: Cut and Serve
Once firm, lift the fudge out of the pan using the parchment paper. Cut into squares and serve chilled. Enjoy your delicious ROCKY ROAD FUDGE!
Recipe Snapshot
| Feature | Details |
|---|---|
| Category | Dessert |
| Cuisine | American |
| Prep Time | 15 minutes |
| Cook Time | 0 minutes |
| Extra Time | 120 minutes (refrigerating) |
| Total Time | 135 minutes |
| Dietary | Vegetarian |
| Serves | 12 |
| Best Served | Chilled and cut into squares! |
Pro Tips for Making ROCKY ROAD FUDGE
- Use high-quality chocolate for a richer flavor.
- Chop nuts and marshmallows evenly for consistent bites.
- Let the fudge cool completely before cutting for clean edges.
- Experiment with different nuts for unique textures.
- Store in an airtight container to keep it fresh longer.
How to Serve this ROCKY ROAD FUDGE
- Cut into bite-sized squares for easy sharing.
- Serve with a scoop of vanilla ice cream on the side.
- Drizzle with caramel or chocolate sauce for extra indulgence.
- Pair with a hot cup of cocoa or coffee for a cozy treat.
- Top with crushed nuts or mini marshmallows for added texture.
- Wrap in colorful cellophane for a delightful gift.
Make Ahead and Storage
You can prepare and store your Rocky Road Fudge with ease:
Storing ROCKY ROAD FUDGE Leftovers
- Allow fudge to cool completely before storing.
- Wrap tightly in plastic wrap or aluminum foil.
- Place in an airtight container for extra protection.
- Store in a cool, dry place or in the refrigerator.
Freezing ROCKY ROAD FUDGE
- Cut fudge into individual pieces for easy thawing.
- Wrap each piece in plastic wrap, then foil.
- Place wrapped pieces in a freezer-safe bag or container.
- Label with the date and freeze for up to 3 months.
Reheating ROCKY ROAD FUDGE
- Remove fudge from the refrigerator or freezer.
- Let it sit at room temperature for about 30 minutes.
- For a warm treat, microwave in short bursts (10-15 seconds).
- Check frequently to avoid melting; enjoy while soft!
Explore more easy breakfast recipes, quick lunch ideas, cozy dinner meals, tasty snacks, and delightful dessert.
Final Thoughts
Making Rocky Road Fudge is like wrapping yourself in a cozy blanket of nostalgia! It’s simple, fun, and oh-so-rewarding. So gather your loved ones, whip up this delightful treat, and enjoy every gooey, chocolatey bite. Trust me, you’ll be smiling from ear to ear as you savor this sweet creation!
Quick answers
Frequently asked questions
Straight answers from the kitchen — storage, swaps, and common sticking points for this recipe.
What is in rocky road fudge?
What are the main ingredients in rocky road?
What is the secret to good fudge?
What’s the difference between Heavenly Hash and rocky road?
Kitchen notes
Nutrition & sources
Calorie and nutrition figures on this page are estimates meant for general home-cooking guidance. Actual values vary with brands, portion size, and how the recipe is prepared.
Estimates draw on typical ingredient data from public nutrition databases such as the USDA FoodData Central. They are not a substitute for professional medical or dietary advice.
For how recipes are tested and when pages are updated, see How we test recipes. Full legal context lives in our disclaimers and affiliate disclosure.


Comments
Made this recipe? Share how it turned out for your family.
No comments yet — be the first to leave a note.