

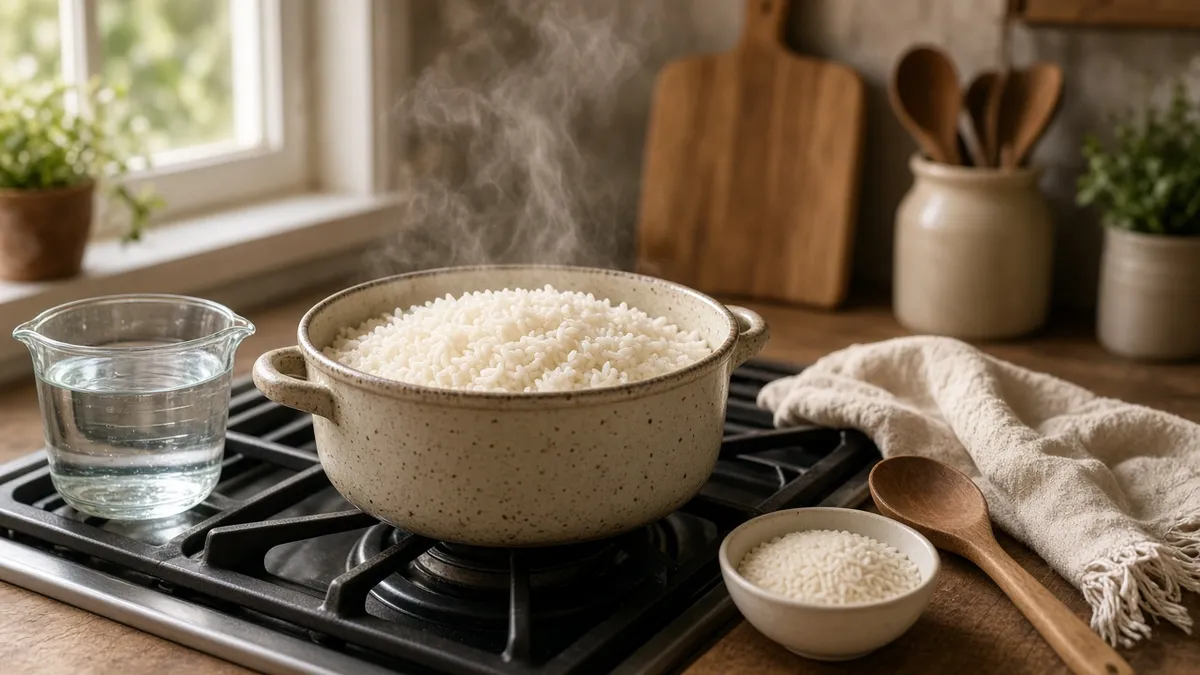
Recipe card
Print / PDFPerfect Rice to Water Ratio
Rate this recipe
Be the first to rate
- Prep Time
- 5 mins
- Cook Time
- 18 mins
- Extra Time
- 10 mins
- Total Time
- 33 mins
Ingredients
- 1 cup long-grain white rice
- 1 1/2 cups water
- 1/2 teaspoon salt
- 1 teaspoon butter or olive oil
Equipment
- Medium saucepan — Use one with a tight-fitting lid.
- Fine-mesh strainer — Helpful for rinsing away excess surface starch.
- Measuring cups — Use a dry cup for rice and a liquid cup for water.
- Fork — Use it to gently fluff the cooked grains.
Method
- 1
Place the rice in a fine-mesh strainer.
- 2
Rinse the rice under cool running water until the water runs mostly clear.
- 3
Combine the rinsed rice, water, salt, and butter or olive oil in a medium saucepan.
- 4
Bring the mixture to a gentle boil over medium-high heat.
- 5
Stir the rice once.
- 6
Cover the saucepan with a tight-fitting lid.
- 7
Reduce the heat to low.
- 8
Simmer the rice for 18 minutes.
- 9
Remove the saucepan from the heat.
- 10
Let the covered rice rest for 10 minutes.
- 11
Fluff the rice with a fork.
- 12
Serve the rice warm.
Notes
| Nutrient | Amount per Serving |
|---|---|
| Calories | 180 |
| Fat | 1g |
| Protein | 4g |
| Carbs | 40g |
Why You'll Love This Rice To Water Ratio
- It uses a simple rice to water ratio that is easy to remember.
- Rinsing the rice helps create tender, separate grains.
- A short resting time lets the steam finish the cooking gently.
- This dependable side dish pairs beautifully with family dinners.
- It needs only a few everyday ingredients and a saucepan.
Ingredients
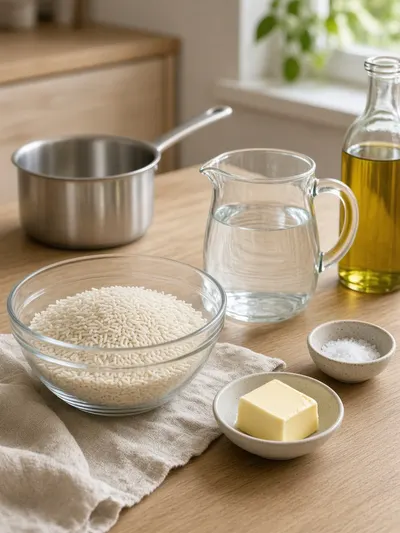
Gather these simple pantry staples for a pot of rice that is fluffy, tender, and ready for all your favorite sauces.
- Long-grain white rice - 1 cup
- Water - 1 1/2 cups
- Salt - 1/2 teaspoon
- Butter or olive oil - 1 teaspoon
How to Make Rice To Water Ratio
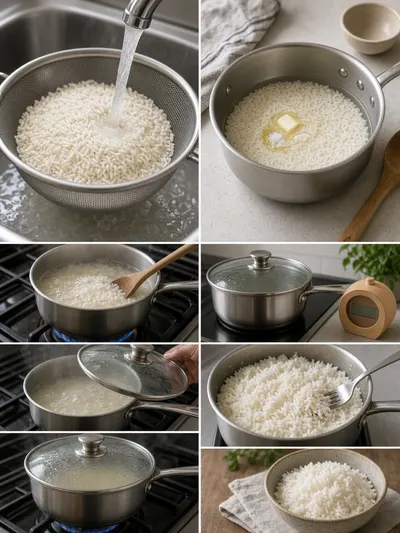
Plan on 5 minutes of prep, 18 minutes of cooking, and 10 minutes of resting time. That little covered rest is one of Grandma's best tricks for beautifully fluffy rice.
Step 1: Set Out a Strainer
Place the rice in a fine-mesh strainer. This makes rinsing simple and keeps the grains together.
Step 2: Rinse the Rice
Rinse the rice under cool running water until the water runs mostly clear. This removes excess surface starch.
Step 3: Combine the Ingredients
Combine the rinsed rice, water, salt, and butter or olive oil in a medium saucepan. Stir gently so the salt and fat are evenly distributed.
Step 4: Bring to a Boil
Bring the mixture to a gentle boil over medium-high heat. Keep an eye on the pan so it does not boil over.
Step 5: Stir Once
Stir the rice once after the water begins boiling. A single stir is enough to settle the grains.
Step 6: Cover the Pan
Cover the saucepan with a tight-fitting lid. A good seal helps hold in the steam needed to cook the rice evenly.
Step 7: Lower the Heat
Reduce the heat to low. The rice should simmer gently rather than boil vigorously.
Step 8: Simmer the Rice
Simmer the rice for 18 minutes. Keep the lid on during this time so the steam stays in the saucepan.
Step 9: Remove from Heat
Remove the saucepan from the heat. Leave the lid in place as the rice finishes settling.
Step 10: Let It Rest
Let the covered rice rest for 10 minutes. This allows the remaining moisture to spread through the grains.
Step 11: Fluff with a Fork
Fluff the rice with a fork. Lift and separate the grains gently without mashing them.
Step 12: Serve Warm
Serve the rice warm. Spoon it into a serving bowl or add it directly to each plate.
Recipe Snapshot
| Feature | Details |
|---|---|
| Category/Course | Dinner, Side dish |
| Cuisine | American |
| Prep Time | 5 minutes |
| Cook Time | 18 minutes |
| Extra Time | 10 minutes resting |
| Total Time | 33 minutes |
| Dietary | Vegetarian |
| Serves | 4 |
| Best Served | Warm alongside stews, vegetables, or family sauces. |
Pro Tips for Making Rice To Water Ratio
- Use a tight-fitting lid so the steam stays in the pan while the rice cooks.
- Keep the heat low after the boil to help prevent scorching on the bottom.
- Resist lifting the lid during cooking, since escaping steam can affect the texture.
- Let the rice rest before fluffing for the lightest, most even grains.
- Use a fork instead of a spoon to gently separate the cooked rice.
How to Serve Rice To Water Ratio

- Spoon it beneath roasted chicken, baked fish, or tender vegetables.
- Pair it with a cozy stew or a family favorite sauce.
- Add a little extra butter and chopped fresh herbs for a simple special touch.
- Serve it as a gentle, comforting side for beans or garden vegetables.
Make Ahead and Storage
Storing Leftovers
- Cool leftover rice promptly and place it in a shallow, covered container.
- Refrigerate within 2 hours and use within 3 to 4 days.
- Store the rice in small portions for easier reheating.
Freezing
- Let the rice cool, then package it in airtight freezer-safe containers or bags.
- Freeze in serving-size portions for up to 1 month for best texture.
- Label each package with the date before placing it in the freezer.
Reheating
- Reheat refrigerated rice until steaming hot throughout.
- Add a small splash of water before reheating to restore moisture.
- Stir gently after reheating and serve promptly.
Explore more easy breakfast recipes, quick lunch ideas, cozy dinner meals, tasty snacks, and delightful dessert.
Final Thoughts
Once you know this simple rice to water ratio, a warm pot of fluffy rice is always close at hand.
FAQs
Here are a few helpful answers for making this everyday rice just right.
What is the rice to water ratio for long-grain white rice?
For this recipe, use 1 cup of long-grain white rice with 1 1/2 cups of water. This ratio produces tender, fluffy rice when cooked as directed.
Should I rinse rice before cooking?
Yes. Rinsing under cool water until it runs mostly clear removes excess surface starch and helps keep the cooked grains from becoming overly sticky.
Why does rice need to rest after cooking?
The covered resting time lets the remaining steam spread through the rice. It helps finish the cooking and gives the grains a lighter texture.
Can I use butter or olive oil?
Yes. Either one adds a little richness and helps keep the grains pleasantly separate. Choose whichever flavor fits your meal best.
Kitchen notes
Nutrition & sources
Calorie and nutrition figures on this page are estimates meant for general home-cooking guidance. Actual values vary with brands, portion size, and how the recipe is prepared.
Estimates draw on typical ingredient data from public nutrition databases such as the USDA FoodData Central. They are not a substitute for professional medical or dietary advice.
For how recipes are tested and when pages are updated, see How we test recipes. Full legal context lives in our disclaimers and affiliate disclosure.


Comments
Made this recipe? Share how it turned out for your family.
No comments yet — be the first to leave a note.