

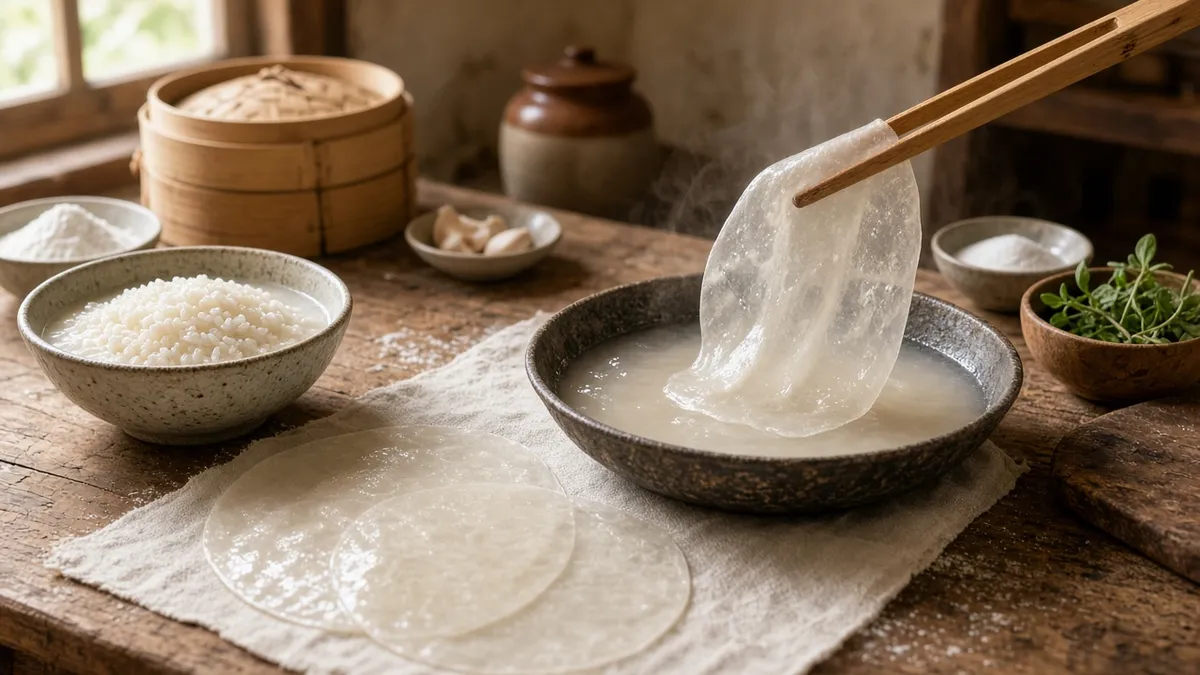
Recipe card
Print / PDFHomemade Rice Paper Wrappers
Rate this recipe
Be the first to rate
- Prep Time
- 20 mins
- Cook Time
- 35 mins
- Extra Time
- 4 hrs
- Total Time
- 55 mins
Ingredients
- 1 cup rice flour
- 1/3 cup tapioca starch
- 1/2 teaspoon fine salt
- 1 1/2 cups water
- 1 teaspoon neutral oil, plus more for brushing
- Water for steaming
Equipment
- Wide cooking pot — Use a pot wide enough for 7-inch wrappers.
- Steamer rack — Keeps the cloth safely above the simmering water.
- Clean cotton cloth — Use a tightly woven, lint-free cloth.
- Mixing bowl — A medium bowl makes whisking easy.
- Whisk — Helps create a smooth, lump-free batter.
- Baking sheets — Use lightly oiled sheets for drying the wrappers.
Method
- 1
Whisk the rice flour, tapioca starch, and salt in a mixing bowl.
- 2
Add the water gradually while whisking until the batter is smooth.
- 3
Stir in 1 teaspoon of neutral oil.
- 4
Rest the batter for 20 minutes.
- 5
Fill a wide pot with 2 inches of water.
- 6
Fit a steamer rack inside the pot.
- 7
Stretch a clean cotton cloth tightly over the pot and secure it safely.
- 8
Bring the water to a steady simmer.
- 9
Brush the cloth lightly with oil.
- 10
Ladle 2 tablespoons of batter onto the cloth and spread it into a thin 7-inch circle.
- 11
Cover the pot and steam the wrapper for 45 seconds.
- 12
Peel the wrapper from the cloth with a flexible spatula.
- 13
Place the wrapper on a lightly oiled baking sheet.
- 14
Repeat with the remaining batter.
- 15
Air-dry the wrappers for 2 to 4 hours, turning them once halfway through.
- 16
Store completely dry wrappers in an airtight container.
Notes
| Nutrient | Amount per Serving |
|---|---|
| Calories | 45 |
| Fat | 0g |
| Protein | 1g |
| Carbs | 10g |
Why You'll Love This Rice Paper
- These homemade wrappers use simple pantry ingredients and no special machine.
- The thin, tender sheets are perfect for fresh rolls, little snacks, and light lunches.
- Making rice paper at home brings a sweet, old-fashioned touch to the kitchen.
- You can prepare the wrappers ahead and keep them ready for filling.
- The recipe is naturally vegan and dairy-free.
Ingredients
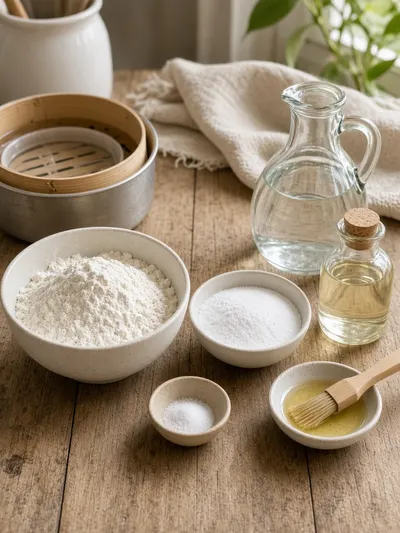
A few humble ingredients come together to make these delicate wrappers. Measure everything before you begin, and keep the batter smooth for the best results.
- Rice flour - 1 cup
- Tapioca starch - 1/3 cup
- Fine salt - 1/2 teaspoon
- Water - 1 1/2 cups
- Neutral oil - 1 teaspoon, plus more for brushing
- Water - for steaming
How to Make Rice Paper
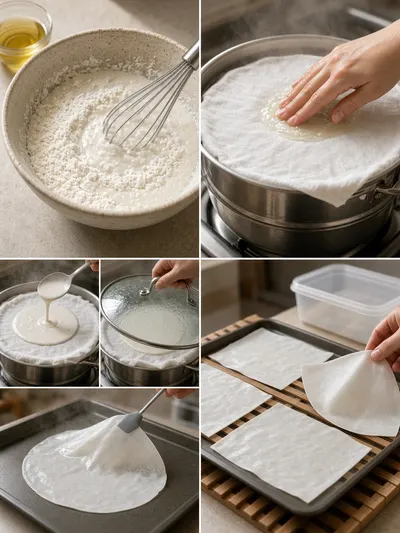
Plan for 20 minutes of prep, 35 minutes of cooking and drying time, plus a 20-minute rest for the batter. The wrappers also need 2 to 4 hours of air-drying after steaming.
Step 1: Whisk the Dry Ingredients
Place the rice flour, tapioca starch, and salt in a mixing bowl. Whisk until the mixture looks evenly combined.
Step 2: Add the Water
Gradually pour in the water while whisking steadily. Continue until the batter is smooth and free of dry pockets.
Step 3: Stir in the Oil
Add 1 teaspoon of neutral oil to the batter. Stir gently until it is fully incorporated.
Step 4: Rest the Batter
Set the batter aside for 20 minutes. This gives the flour and starch time to hydrate and helps the wrappers cook evenly.
Step 5: Fill the Pot
Pour water into a wide pot until it reaches about 2 inches deep. Leave enough room for the steamer setup without letting the water touch the cloth.
Step 6: Fit the Steamer Rack
Place a steamer rack inside the pot. Check that it sits securely and leaves a stable surface for the cloth.
Step 7: Secure the Cloth
Stretch a clean cotton cloth tightly over the pot and secure it safely. Keep the cloth taut so the batter can spread into a thin circle.
Step 8: Simmer the Water
Bring the water to a steady simmer. Keep the steam gentle and consistent as you work.
Step 9: Oil the Cloth
Brush the cloth lightly with oil. A very thin coating helps the cooked wrapper release without becoming greasy.
Step 10: Spread the Batter
Ladle 2 tablespoons of batter onto the cloth. Quickly spread it into a thin circle about 7 inches wide.
Step 11: Steam the Wrapper
Cover the pot and steam the wrapper for 45 seconds. It should look smooth and set when ready.
Step 12: Peel the Wrapper
Use a flexible spatula to gently peel the wrapper from the cloth. Work slowly so the delicate sheet stays whole.
Step 13: Transfer the Wrapper
Place the wrapper on a lightly oiled baking sheet. Lay it flat and smooth out any large folds.
Step 14: Repeat the Process
Continue with the remaining batter, lightly oiling the cloth as needed. Keep each wrapper in a single layer on the baking sheet.
Step 15: Air-Dry the Wrappers
Air-dry the wrappers for 2 to 4 hours, turning them once halfway through. They should feel completely dry before storage.
Step 16: Store the Wrappers
Place the completely dry wrappers in an airtight container. Keep them protected from moisture until you are ready to use them.
Recipe Snapshot
| Feature | Details |
|---|---|
| Category/Course | Snacks / Snack |
| Cuisine | Asian-inspired |
| Prep Time | 20 minutes |
| Cook Time | 35 minutes |
| Extra Time | 2 to 4 hours drying |
| Total Time | 55 minutes, plus drying |
| Dietary | Vegan, dairy-free |
| Serves | 16 wrappers |
| Best Served | Filled with fresh vegetables, herbs, and your favorite dipping sauce. |
Pro Tips for Making Rice Paper
- Whisk the batter again if it sits for a while, since the flour and starch can settle.
- Spread each portion quickly while the cloth is hot and steamy.
- Use only a light film of oil on the cloth and baking sheet to prevent a heavy texture.
- Dry the wrappers fully before storing, since leftover moisture can make them stick together.
- Keep the finished sheets flat while they dry for the most even shape.
How to Serve Rice Paper
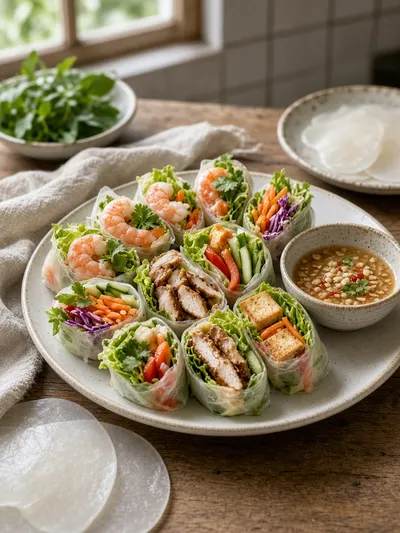
- Fill the wrappers with crisp lettuce, cucumber, carrots, fresh herbs, and a simple dipping sauce.
- Use them for fresh rolls with cooked shrimp, chicken, tofu, or tender vegetables.
- Cut dried wrappers into smaller pieces for light snack portions after softening them.
- Serve a platter of filled rolls at family gatherings, lunches, or casual afternoon meals.
Make Ahead and Storage
Storing Leftovers
- Store completely dry wrappers in an airtight container at room temperature in a cool, dry cupboard.
- Place parchment between wrappers if they tend to cling together.
- Use them within several days for the best texture, and discard any wrappers with signs of moisture or spoilage.
Freezing
- Stack dry wrappers with parchment between each one and place them in a freezer-safe airtight container.
- Thaw the sealed container at room temperature so condensation does not collect directly on the wrappers.
- Let them return fully to room temperature before softening and filling.
Reheating
- These wrappers do not need oven reheating. To make them flexible for rolling, dip one briefly in warm water and place it on a clean plate.
- Allow the softened wrapper to rest for a few seconds before adding fillings.
- Do not microwave the dry wrappers, as they can become brittle or unevenly heated.
Explore more easy breakfast recipes, quick lunch ideas, cozy dinner meals, tasty snacks, and delightful dessert.
Final Thoughts
These homemade rice paper wrappers are a lovely little kitchen project, turning simple ingredients into something tender, useful, and ready for sharing.
FAQs
Here are a few helpful answers for making and using your homemade wrappers.
Can I make the batter ahead of time?
Yes, you can prepare the batter ahead and keep it covered in the refrigerator for a short time. Whisk it well before steaming, and let it come closer to room temperature for easier spreading.
Why are my wrappers tearing?
The batter may be spread too thin, or the wrapper may need a few more seconds of steaming. Handle each sheet gently with a flexible spatula and keep the cloth lightly oiled.
Why are my wrappers sticking together?
They may not be fully dry, or they may have been stacked while still warm. Let them dry completely and place parchment between sheets during storage.
How do I soften dried rice paper for rolls?
Dip one wrapper briefly in warm water, then place it on a clean plate for a few seconds. It will continue softening as you add the filling and roll it.
Kitchen notes
Nutrition & sources
Calorie and nutrition figures on this page are estimates meant for general home-cooking guidance. Actual values vary with brands, portion size, and how the recipe is prepared.
Estimates draw on typical ingredient data from public nutrition databases such as the USDA FoodData Central. They are not a substitute for professional medical or dietary advice.
For how recipes are tested and when pages are updated, see How we test recipes. Full legal context lives in our disclaimers and affiliate disclosure.


Comments
Made this recipe? Share how it turned out for your family.
No comments yet — be the first to leave a note.