

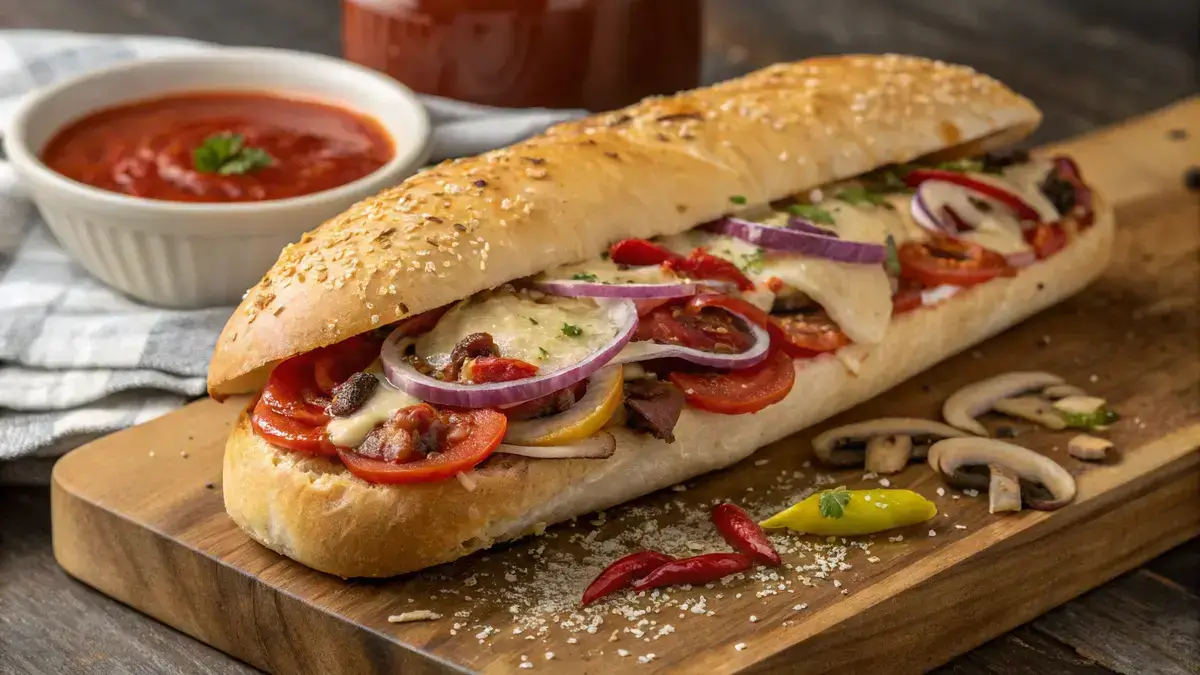
Recipe card
Print / PDFHomemade Pizza Sub
Rate this recipe
Be the first to rate
- Prep Time
- 10 mins
- Cook Time
- 12 mins
- Total Time
- 22 mins
Ingredients
- 1 sub roll Sub Roll (Your favorite type for a perfect base.)
- 1/2 cup Pizza Sauce (For that classic pizza flavor.)
- 1 cup Shredded Mozzarella Cheese (Gooey and melty goodness.)
- 6 slices Pepperoni (Or your preferred meat substitute.)
- 1/4 cup Sliced Bell Peppers (Add crunch and color.)
- 1/4 cup Sliced Onions (For a sweet and savory kick.)
- 1/4 cup Sliced Mushrooms (Earthy flavor to enhance the taste.)
- 1 tbsp Olive Oil (To enrich the flavor.)
- 1 tsp Dried Oregano (For that Italian herb profile.)
- to taste Salt and Pepper (Season to your liking.)
Equipment
- 1 Oven — For baking the pizza sub.
- 1 Foil — To wrap the sub before baking.
Method
- 1
Preheat your oven to 375°F. This will ensure your pizza sub bakes perfectly.
- 2
Slice the sub roll lengthwise. Lightly brush the cut sides with olive oil for a golden finish.
- 3
Spread pizza sauce evenly on the bottom half of the sub roll. Don’t be shy; make it saucy!
- 4
Layer mozzarella cheese, pepperoni, bell peppers, onions, and mushrooms on top of the sauce. Pile it high!
- 5
Sprinkle oregano, salt, and pepper over the toppings. This adds a burst of flavor!
- 6
Close the sandwich and wrap it in foil. This helps keep everything warm and melty.
- 7
Bake in the preheated oven for 10–12 minutes. You’ll know it’s ready when the cheese is melted and the bread is crisp.
- 8
Unwrap your pizza sub and serve it hot. Enjoy every cheesy bite!
Notes
| Nutrient | Amount per Serving |
|---|---|
| Calories | 350 |
| Fat | 18g |
| Protein | 20g |
| Carbohydrates | 30g |
Why You’ll Love This pizza sub
- It’s a fun twist on traditional pizza that’s easy to make at home.
- Loaded with gooey cheese and your favorite toppings for maximum flavor.
- Perfect for a quick lunch or a satisfying dinner that everyone will enjoy.
- Customizable to suit your taste—add veggies, meats, or even a spicy kick!
Ingredients
Get ready to whip up a delicious pizza sub that’s easy and bursting with flavor!
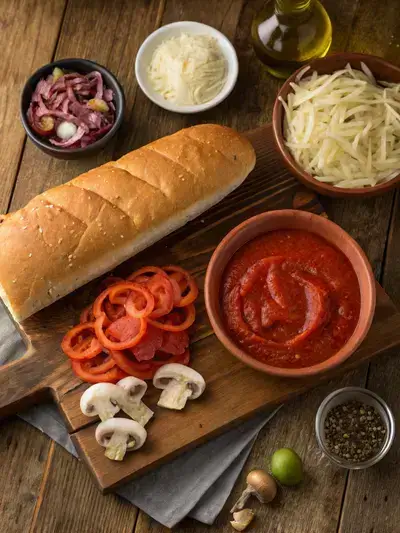
- 1 sub roll – your favorite type for a perfect base
- 1/2 cup pizza sauce – for that classic pizza flavor
- 1 cup shredded mozzarella cheese – gooey and melty goodness
- 6 pepperoni slices – or your preferred meat substitute
- 1/4 cup sliced bell peppers – add crunch and color
- 1/4 cup sliced onions – for a sweet and savory kick
- 1/4 cup sliced mushrooms – earthy flavor to enhance the taste
- 1 tbsp olive oil – to enrich the flavor
- 1 tsp dried oregano – for that Italian herb profile
- salt and pepper to taste – season to your liking
How to Make Pizza Sub
Get ready to enjoy a delicious homemade pizza sub! With a preparation time of about 10 minutes and a cooking time of 10–12 minutes, you’ll have a cheesy, flavorful meal in no time. Let’s dive into the steps!
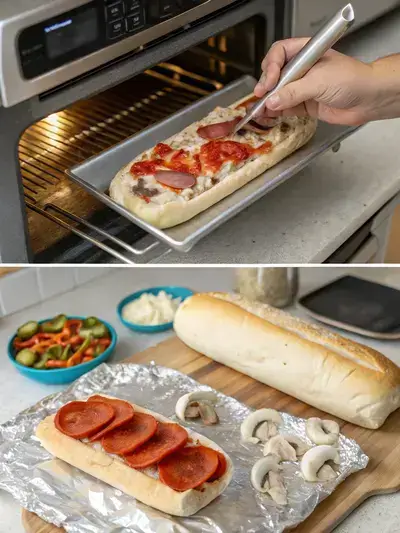
Step 1: Preheat the Oven
Preheat your oven to 375°F. This will ensure your sub bakes perfectly.
Step 2: Prepare the Sub Roll
Slice the sub roll lengthwise. Lightly brush the cut sides with olive oil for a golden finish.
Step 3: Add Pizza Sauce
Spread pizza sauce evenly on the bottom half of the sub roll. Don’t be shy; make it saucy!
Step 4: Layer the Goodies
Layer mozzarella cheese, pepperoni, bell peppers, onions, and mushrooms on top of the sauce. Pile it high!
Step 5: Season It Up
Sprinkle oregano, salt, and pepper over the toppings. This adds a burst of flavor!
Step 6: Close and Wrap
Close the sandwich and wrap it in foil. This helps keep everything warm and melty.
Step 7: Bake to Perfection
Bake in the preheated oven for 10–12 minutes. You’ll know it’s ready when the cheese is melted and the bread is crisp.
Step 8: Serve Hot
Unwrap your pizza sub and serve it hot. Enjoy every cheesy bite!
Recipe Snapshot
| Feature | Details |
|---|---|
| Category | Main Course |
| Cuisine | Italian |
| Prep Time | 10 minutes |
| Cook Time | 12 minutes |
| Extra Time | 0 minutes |
| Total Time | 22 minutes |
| Dietary | Not specified |
| Serves | 1 |
| Best Served | Hot and cheesy |
Pro Tips for Making pizza sub
- Opt for fresh, crusty sub rolls for the best texture.
- Layer your toppings evenly for balanced flavor in every bite.
- Experiment with different cheeses for a unique twist.
- Toast the sub in the oven for a crispy finish.
- Add fresh herbs like basil or oregano for a burst of freshness.
How to Serve this pizza sub
- Serve with a side of crispy potato wedges for a satisfying crunch.
- Pair with a fresh garden salad drizzled with balsamic vinaigrette.
- Enjoy with a side of marinara sauce for dipping—extra cheesy goodness!
- Top with fresh basil or arugula for a burst of flavor and color.
Make Ahead and Storage
Storing and enjoying your pizza sub later is easy!
Storing Leftovers
- Allow the pizza sub to cool completely.
- Wrap it tightly in plastic wrap or aluminum foil.
- Store in an airtight container in the fridge.
- Consume within 3-4 days for best quality.
Freezing
- Wrap each pizza sub individually in plastic wrap.
- Place wrapped subs in a freezer-safe bag or container.
- Label with the date and freeze for up to 2 months.
- Thaw in the fridge before reheating for best results.
Reheating
- Preheat your oven to 350°F (175°C).
- Unwrap the pizza sub and place it on a baking sheet.
- Heat for about 10-15 minutes until warmed through.
- For a crispy crust, broil for an additional 1-2 minutes.
Explore more easy breakfast recipes, quick lunch ideas, cozy dinner meals, tasty snacks, and delightful dessert.
Final Thoughts
There you have it, your very own homemade pizza sub! It’s easy, cheesy, and bursting with flavor—just like the ones you remember from your favorite pizzeria. So gather your ingredients, get creative, and enjoy every delicious bite. Trust me, this simple recipe is sure to become a family favorite!
Quick answers
Frequently asked questions
Straight answers from the kitchen — storage, swaps, and common sticking points for this recipe.
What is in the pizza sub?
How to make your own pizza sub?
Does Jimmy John’s have a pizza sub?
What goes on pizza subs?
Kitchen notes
Nutrition & sources
Calorie and nutrition figures on this page are estimates meant for general home-cooking guidance. Actual values vary with brands, portion size, and how the recipe is prepared.
Estimates draw on typical ingredient data from public nutrition databases such as the USDA FoodData Central. They are not a substitute for professional medical or dietary advice.
For how recipes are tested and when pages are updated, see How we test recipes. Full legal context lives in our disclaimers and affiliate disclosure.


Comments
Made this recipe? Share how it turned out for your family.
No comments yet — be the first to leave a note.