

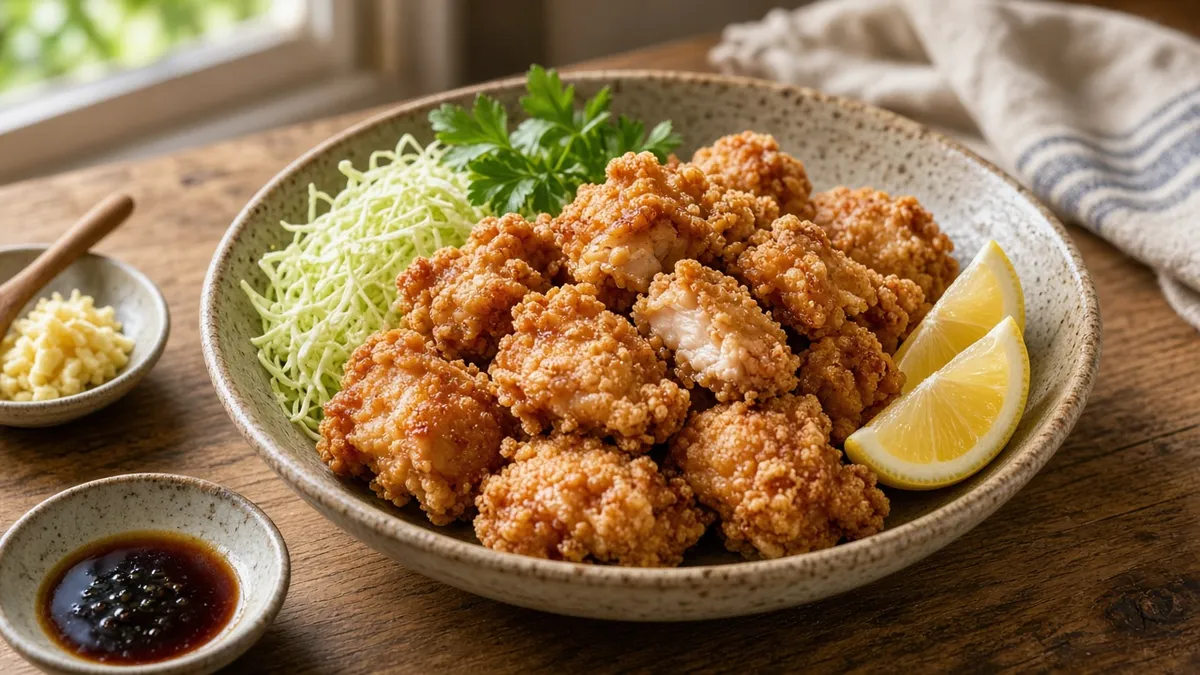
Recipe card
Print / PDFGrandma's Crispy Chicken Karaage
Rate this recipe
Be the first to rate
- Prep Time
- 45 mins
- Cook Time
- 25 mins
- Total Time
- 1 hr 10 mins
Ingredients
- 1 1/2 pounds boneless, skinless chicken thighs, cut into 1 1/2-inch pieces
- 1/4 cup low-sodium soy sauce
- 1 tablespoon grated fresh ginger
- 2 garlic cloves, finely grated
- 1 teaspoon toasted sesame oil
- 1 teaspoon granulated sugar
- 1/2 cup cornstarch
- 1/4 cup all-purpose flour
- 4 cups neutral frying oil, such as canola or vegetable oil
- 1 lemon, cut into wedges
- 2 scallions, thinly sliced
Equipment
- Large mixing bowl — For marinating the chicken
- Shallow dish — For the cornstarch coating
- Heavy pot or deep skillet — Use a sturdy pan with enough room for the oil
- Instant-read thermometer — For checking the oil and chicken temperature
- Wire rack and sheet pan — For draining the fried chicken while keeping it crisp
Method
- 1
Place the chicken pieces in a large mixing bowl.
- 2
Add the soy sauce, ginger, garlic, sesame oil, and sugar.
- 3
Toss the chicken until it is evenly coated.
- 4
Cover the bowl and refrigerate the chicken for 30 minutes.
- 5
Combine the cornstarch and flour in a shallow dish.
- 6
Coat each chicken piece with the flour mixture.
- 7
Heat the oil to 350°F in a heavy pot or deep skillet.
- 8
Fry the chicken in small batches for 5 to 7 minutes.
- 9
Check that the thickest chicken pieces reach 165°F internally.
- 10
Drain the karaage on a wire rack over a sheet pan.
- 11
Garnish the karaage with scallions.
- 12
Serve the karaage with lemon wedges.
Notes
| Nutrient | Amount per Serving |
|---|---|
| Calories | 520 |
| Fat | 29g |
| Protein | 36g |
| Carbs | 28g |
Why You'll Love This Karaage
- Each bite has a wonderfully crisp, craggy coating and juicy chicken inside.
- Ginger, garlic, soy sauce, and sesame oil bring cozy, savory flavor to the table.
- The chicken marinates in the refrigerator while you tidy the kitchen or prepare side dishes.
- Fresh lemon and scallions add a bright finish that balances the rich, golden coating.
- This karaage feels special enough for company but remains simple enough for a family supper.
Ingredients
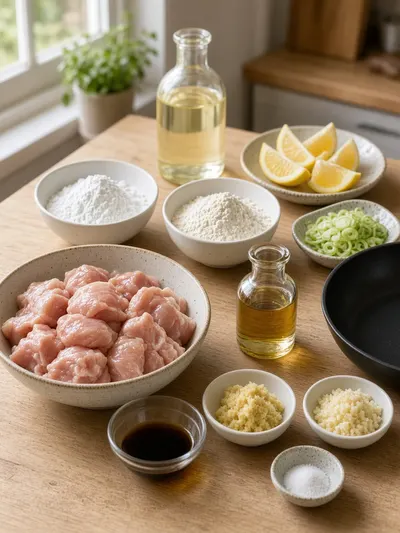
Gather these simple ingredients for tender chicken and a light, crisp coating that turns beautifully golden in the pan.
- Boneless, skinless chicken thighs - 1 1/2 pounds, cut into 1 1/2-inch pieces
- Low-sodium soy sauce - 1/4 cup
- Fresh ginger - 1 tablespoon, grated
- Garlic - 2 cloves, finely grated
- Toasted sesame oil - 1 teaspoon
- Granulated sugar - 1 teaspoon
- Cornstarch - 1/2 cup
- All-purpose flour - 1/4 cup
- Neutral frying oil - 4 cups, such as canola or vegetable oil
- Lemon - 1, cut into wedges
- Scallions - 2, thinly sliced
How to Make Karaage
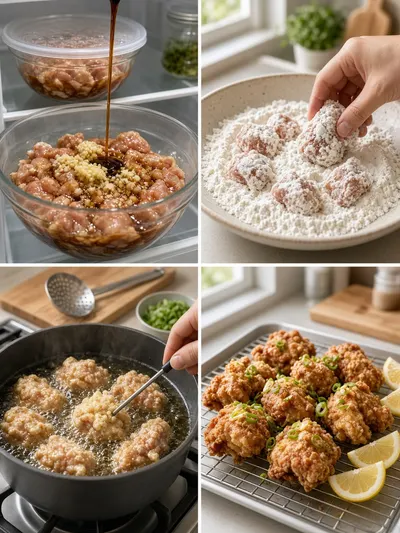
Plan for 45 minutes of prep, including 30 minutes of resting time in the refrigerator, followed by about 25 minutes of cooking. Have a wire rack ready before frying so the karaage stays crisp as it drains.
Step 1: Add the Chicken
Place the chicken pieces in a large mixing bowl. A roomy bowl makes it easier to coat every piece evenly without making a mess.
Step 2: Add the Seasonings
Add the soy sauce, ginger, garlic, sesame oil, and sugar to the bowl. These ingredients create the savory, fragrant marinade that gives karaage its comforting flavor.
Step 3: Coat the Chicken
Toss the chicken until it is evenly coated with the marinade. Turn the pieces gently so the seasonings reach all the nooks and crannies.
Step 4: Rest the Marinade
Cover the bowl and refrigerate the chicken for 30 minutes. This short resting time lets the flavors settle into the chicken while keeping the preparation manageable.
Step 5: Mix the Coating
Combine the cornstarch and flour in a shallow dish. Mixing the two creates a coating that is crisp, delicate, and pleasantly craggy.
Step 6: Coat Each Piece
Coat each chicken piece with the flour mixture. Turn the pieces until they are covered all around, then let excess coating fall back into the dish.
Step 7: Heat the Oil
Heat the oil to 350°F in a heavy pot or deep skillet. Use a thermometer to check the temperature, and leave plenty of room at the top of the pot for safe frying.
Step 8: Fry in Batches
Fry the chicken in small batches for 5 to 7 minutes. Avoid crowding the pot, since too many pieces at once can lower the oil temperature and soften the coating.
Step 9: Check for Doneness
Check that the thickest chicken pieces reach 165°F internally. Take the temperature in the center of a piece for the most reliable reading.
Step 10: Drain the Karaage
Drain the karaage on a wire rack over a sheet pan. The rack allows extra oil to drip away while helping the crisp coating stay lifted instead of becoming soggy.
Step 11: Add the Scallions
Garnish the karaage with scallions. Their fresh, mild onion flavor adds a pretty pop of color and a little brightness.
Step 12: Serve with Lemon
Serve the karaage with lemon wedges. A gentle squeeze of lemon just before eating brings all the savory flavors into balance.
Recipe Snapshot
| Feature | Details |
|---|---|
| Category/Course | Dinner |
| Cuisine | Japanese |
| Prep Time | 45 minutes |
| Cook Time | 25 minutes |
| Total Time | 1 hour 10 minutes |
| Dietary | Dairy-free and alcohol-free |
| Serves | 4 |
| Best Served | Hot with lemon wedges and scallions |
Pro Tips for Making Karaage
- Cut the chicken pieces close to the same size so they cook at the same rate.
- Do not skip the 30-minute marinade, since it gives the chicken its signature savory flavor.
- Coat the chicken just before frying so the cornstarch and flour stay dry and crisp.
- Keep an eye on the oil temperature between batches and let it return to 350°F before adding more chicken.
- Use a wire rack instead of paper towels when possible, as it helps protect the crisp coating.
How to Serve Karaage
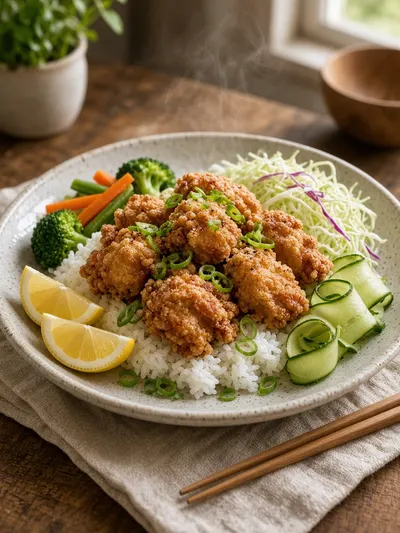
- Serve the hot karaage over steamed rice with extra scallions and lemon wedges.
- Add a simple cucumber salad or shredded cabbage for a fresh, crunchy contrast.
- Pair it with steamed vegetables for a colorful and satisfying family dinner.
- Arrange it on a platter with lemon wedges for a welcoming shared meal.
Make Ahead and Storage
Storing Leftovers
- Let leftover karaage cool before placing it in a covered container.
- Refrigerate leftovers promptly and enjoy them within 3 to 4 days.
- Store the chicken separately from lemon wedges and fresh garnishes when possible.
Freezing
- Cool the cooked karaage completely before freezing it in a freezer-safe container or bag.
- Place pieces in a single layer first so they do not freeze together in one large clump.
- Use frozen karaage within 2 months for the best texture and flavor.
Reheating
- Reheat refrigerated or thawed karaage in a 400°F oven or air fryer until hot and crisp.
- Arrange the pieces in a single layer so the hot air can reach the coating.
- Make sure the chicken is steaming hot throughout before serving.
Explore more easy breakfast recipes, quick lunch ideas, cozy dinner meals, tasty snacks, and delightful dessert.
Final Thoughts
With its crisp coating, tender center, and bright lemon finish, this homemade karaage brings a little golden comfort to any family table.
FAQs
Here are a few helpful answers for making this cozy chicken dinner at home.
Can I use chicken breasts instead of thighs?
Yes, chicken breasts can be used, but thighs are more forgiving and tend to stay juicier during frying. If using breasts, cut the pieces evenly and take care not to overcook them.
Can I marinate the chicken longer?
Yes, the chicken can rest in the refrigerator for several hours. Keep it covered and refrigerated, and coat it shortly before frying for the crispest result.
Why did my karaage turn out soft?
Soft coating can happen when the oil is not hot enough, the pot is crowded, or the chicken is placed directly on a flat surface while draining. Fry in small batches and use a wire rack.
What can I serve with karaage?
Steamed rice, shredded cabbage, cucumber salad, and steamed vegetables all make lovely partners. Lemon wedges and scallions add a fresh finish to the plate.
Kitchen notes
Nutrition & sources
Calorie and nutrition figures on this page are estimates meant for general home-cooking guidance. Actual values vary with brands, portion size, and how the recipe is prepared.
Estimates draw on typical ingredient data from public nutrition databases such as the USDA FoodData Central. They are not a substitute for professional medical or dietary advice.
For how recipes are tested and when pages are updated, see How we test recipes. Full legal context lives in our disclaimers and affiliate disclosure.


Comments
Made this recipe? Share how it turned out for your family.
No comments yet — be the first to leave a note.