

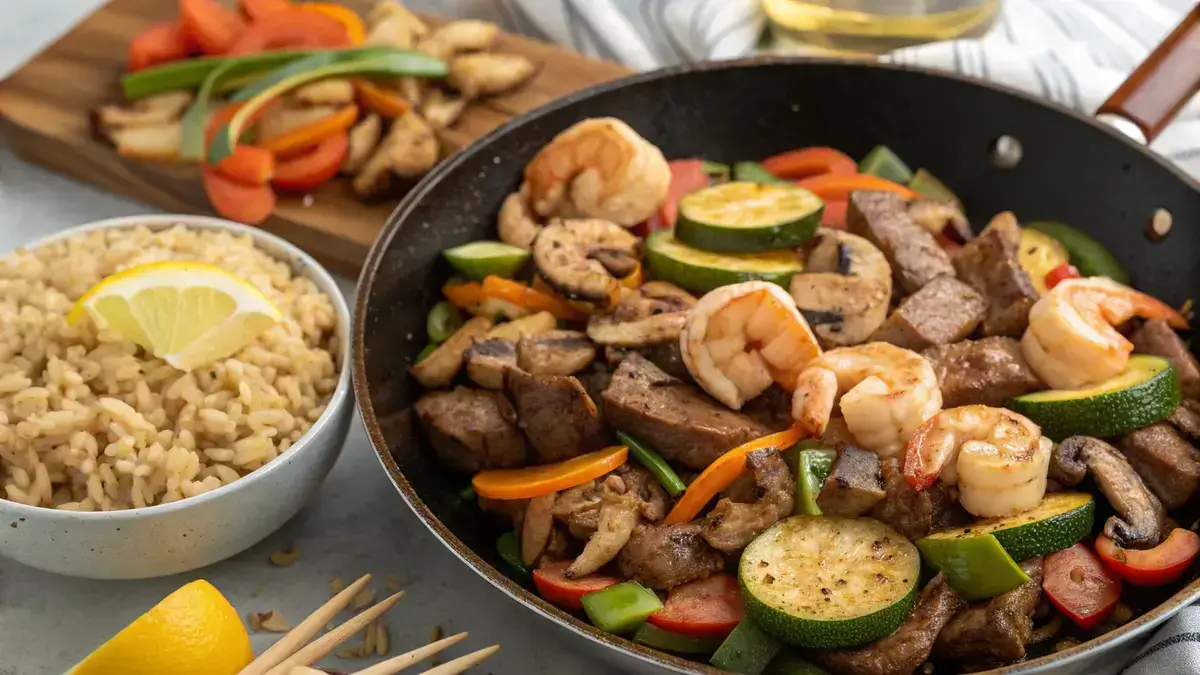
Recipe card
Print / PDFHomemade Hibachi
Rate this recipe
Be the first to rate
- Prep Time
- 15 mins
- Cook Time
- 20 mins
- Total Time
- 35 mins
Ingredients
- 1 lb chicken breast (Diced)
- 8 oz shrimp (Peeled and deveined)
- 8 oz flank steak (Thinly sliced)
- 2 cups cooked white rice (For serving)
- 2 eggs beaten
- 1 cup zucchini (Sliced)
- 1 cup mushrooms (Sliced)
- 1 cup carrots (Julienned)
- 1 cup onion (Sliced)
- 2 cloves garlic (Minced)
- 3 tablespoons soy sauce (For flavor)
- 2 tablespoons butter (For cooking)
- 1 tablespoon vegetable oil (For sautéing)
- 1 teaspoon sesame oil (For finishing)
- to taste salt and pepper
- lemon wedges (For garnish)
Equipment
- 1 Large skillet or griddle — For cooking the hibachi ingredients.
Method
- 1
Step 1: Heat a large skillet or griddle over medium-high heat. Add a splash of vegetable oil to get things sizzling!
- 2
Step 2: Season your chicken, shrimp, and steak with a sprinkle of salt and pepper. Let those flavors mingle!
- 3
Step 3: Add a pat of butter to the skillet. Cook the chicken until it’s beautifully browned and cooked through. Remove it from the skillet and keep it warm.
- 4
Step 4: Next, add the steak to the skillet. Sear it briefly on both sides for that perfect crust. Remove and keep warm.
- 5
Step 5: Now, it’s shrimp time! Cook the shrimp until they turn pink and opaque. Remove and keep warm.
- 6
Step 6: Add minced garlic to the skillet and sauté for about 30 seconds until fragrant. Your kitchen will smell amazing!
- 7
Step 7: Add chopped onion, zucchini, mushrooms, and carrots. Stir-fry until they are tender-crisp. Keep that vibrant color!
- 8
Step 8: Push the vegetables to one side of the skillet. Add a bit more butter on the empty side and pour in beaten eggs. Scramble lightly until just set.
- 9
Step 9: Mix the vegetables and eggs together. Then, add in the cooked rice and stir to heat through. It’s coming together!
- 10
Step 10: Drizzle soy sauce and sesame oil over the rice and vegetables. Mix well to ensure every bite is packed with flavor.
- 11
Step 11: Return the chicken, steak, and shrimp to the skillet. Toss everything together and heat through. It’s a feast!
- 12
Step 12: Serve immediately with lemon wedges on the side. Enjoy your homemade hibachi masterpiece!
Notes
| Nutrient | Amount per Serving |
|---|---|
| Calories | 450 |
| Fat | 20g |
| Protein | 30g |
| Carbs | 40g |
Why You’ll Love This homemade hibachi
- Enjoy the authentic taste of Japanese steakhouse right at home.
- Customize your ingredients for a meal that suits your family’s preferences.
- Quick and easy to prepare, perfect for busy weeknights.
- Impress your friends with your cooking skills at your next gathering.
Ingredients
Gather these fresh ingredients for a delightful homemade hibachi experience!
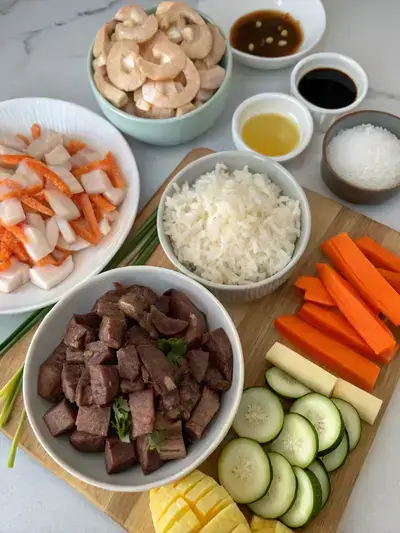
- 1 lb chicken breast – diced
- 8 oz shrimp– peeled and deveined
- 8 oz flank steak – thinly sliced
- 2 cups cooked white rice – for serving
- 2 eggs – beaten
- 1 cup zucchini – sliced
- 1 cup mushrooms– sliced
- 1 cup carrots – julienned
- 1 cup onion – sliced
- 2 cloves garlic – minced
- 3 tablespoons soy sauce – for flavor
- 2 tablespoons butter – for cooking
- 1 tablespoon vegetable oil – for sautéing
- 1 teaspoon sesame oil – for finishing
- Salt and pepper – to taste
- Lemon wedges – for garnish
How to Make Homemade Hibachi
Get ready for a delightful culinary adventure! This homemade hibachi recipe takes about 15 minutes to prepare and 20 minutes to cook, making it a quick and satisfying meal. Gather your ingredients and let’s create a delicious Japanese steakhouse-style dinner right at home!
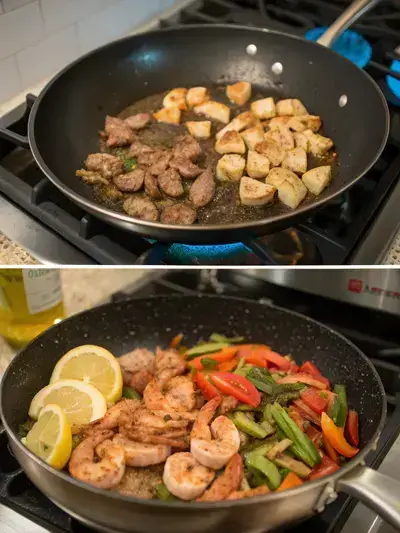
Step 1: Heat the Skillet
Heat a large skillet or griddle over medium-high heat. Add a splash of vegetable oil to get things sizzling!
Step 2: Season the Proteins
Season your chicken, shrimp, and steak with a sprinkle of salt and pepper. Let those flavors mingle!
Step 3: Cook the Chicken
Add a pat of butter to the skillet. Cook the chicken until it’s beautifully browned and cooked through. Remove it from the skillet and keep it warm.
Step 4: Sear the Steak
Next, add the steak to the skillet. Sear it briefly on both sides for that perfect crust. Remove and keep warm.
Step 5: Cook the Shrimp
Now, it’s shrimp time! Cook the shrimp until they turn pink and opaque. Remove and keep warm.
Step 6: Sauté the Garlic
Add minced garlic to the skillet and sauté for about 30 seconds until fragrant. Your kitchen will smell amazing!
Step 7: Stir-Fry the Vegetables
Add chopped onion, zucchini, mushrooms, and carrots. Stir-fry until they are tender-crisp. Keep that vibrant color!
Step 8: Scramble the Eggs
Push the vegetables to one side of the skillet. Add a bit more butter on the empty side and pour in beaten eggs. Scramble lightly until just set.
Step 9: Combine Everything
Mix the vegetables and eggs together. Then, add in the cooked rice and stir to heat through. It’s coming together!
Step 10: Add Flavor
Drizzle soy sauce and sesame oil over the rice and vegetables. Mix well to ensure every bite is packed with flavor.
Step 11: Toss in the Proteins
Return the chicken, steak, and shrimp to the skillet. Toss everything together and heat through. It’s a feast!
Step 12: Serve and Enjoy
Serve immediately with lemon wedges on the side. Enjoy your homemade hibachi masterpiece!
Recipe Snapshot
| Feature | Details |
|---|---|
| Category | Dinner |
| Cuisine | Japanese |
| Prep Time | 15 minutes |
| Cook Time | 20 minutes |
| Extra Time | 0 minutes |
| Total Time | 35 minutes |
| Dietary | High Protein |
| Serves | 4 |
| Best Served | Hot with lemon wedges |
Pro Tips for Making Homemade Hibachi
- Prep all your ingredients beforehand for a smooth cooking experience.
- Use a high smoke point oil like canola or avocado for better searing.
- Keep your grill or skillet hot to achieve that perfect char.
- Don’t overcrowd the pan; cook in batches for even cooking.
- Experiment with different vegetables for a colorful and tasty mix.
How to Serve this homemade hibachi
- Serve with a side of fried rice for that classic hibachi experience.
- Add grilled vegetables like zucchini, bell peppers, and onions for a colorful plate.
- Pair with a refreshing cucumber salad dressed in rice vinegar.
- Offer dipping sauces like soy sauce or a homemade ginger sauce for extra flavor.
- Garnish with sesame seeds and chopped green onions for a pop of color.
- For a fun twist, serve in lettuce wraps for a low-carb option.
- Complete the meal with a side of miso soup for a traditional touch.
Make Ahead and Storage
Storing and enjoying your homemade hibachi later is easy!
Storing Leftovers
- Allow leftovers to cool to room temperature.
- Transfer to airtight containers.
- Store in the refrigerator for up to 3 days.
- Label containers with the date for easy tracking.
Freezing
- Cool leftovers completely before freezing.
- Use freezer-safe containers or heavy-duty freezer bags.
- Remove as much air as possible to prevent freezer burn.
- Freeze for up to 2 months for best quality.
Reheating
- Thaw in the refrigerator overnight before reheating.
- Use a skillet over medium heat for even warming.
- Add a splash of water or broth to maintain moisture.
- Stir frequently until heated through for best texture.
Explore more easy breakfast recipes, quick lunch ideas, cozy dinner meals, tasty snacks, and delightful dessert.
Final Thoughts
Now that you have your homemade hibachi recipe, get ready to impress your family and friends! This delightful dish is not only simple to make but also brings the joy of a Japanese steakhouse right to your kitchen. So fire up that grill, savor the flavors, and enjoy every delicious bite. Happy cooking!
Quick answers
Frequently asked questions
Straight answers from the kitchen — storage, swaps, and common sticking points for this recipe.
What’s the secret to hibachi flavor?
What seasoning do they use at hibachi?
What is the liquid they spray in your mouth at hibachi?
What do they put in hibachi rice?
Kitchen notes
Nutrition & sources
Calorie and nutrition figures on this page are estimates meant for general home-cooking guidance. Actual values vary with brands, portion size, and how the recipe is prepared.
Estimates draw on typical ingredient data from public nutrition databases such as the USDA FoodData Central. They are not a substitute for professional medical or dietary advice.
For how recipes are tested and when pages are updated, see How we test recipes. Full legal context lives in our disclaimers and affiliate disclosure.


Comments
Made this recipe? Share how it turned out for your family.
No comments yet — be the first to leave a note.