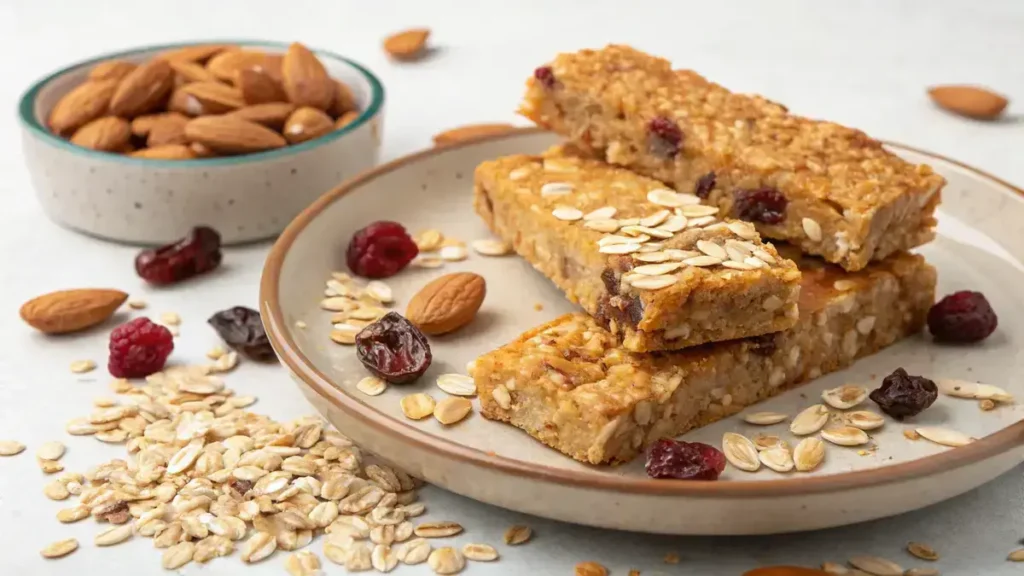
Homemade granola bars are the perfect blend of wholesome ingredients and cozy flavor, making them a snack you’ll reach for any time of day. Crunchy oats, toasted almonds, and sweet raisins come together with golden honey and maple syrup for natural sweetness and a delightful chewy texture. A hint of cinnamon, coconut flakes, and chia seeds add extra warmth and crunch, turning simple ingredients into something special. Whether you pack them for school lunches, grab one after a workout, or enjoy them with a cup of coffee, homemade granola bars are an easy, nourishing treat that feels both comforting and satisfying.
Table of Contents
Why You’ll Love This Homemade Granola Bars
- Perfect for a quick breakfast or snack on-the-go.
- Customizable with your favorite nuts, seeds, and dried fruits.
- Made with wholesome ingredients, free from preservatives.
- Easy to make and budget-friendly for the whole family.
- Deliciously satisfying, keeping you energized throughout the day.
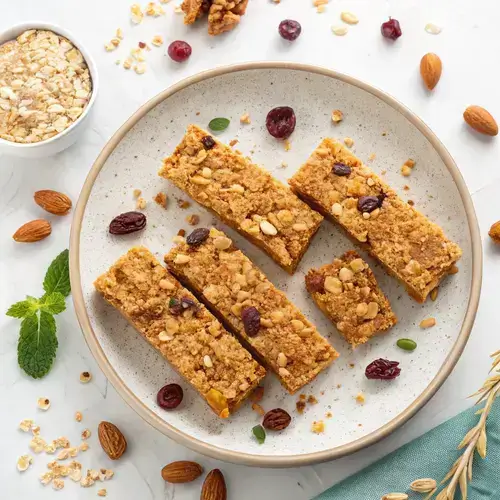
Homemade Granola Bars
Ingredients
Equipment
Method
- Step 1: Preheat the Oven – Start by preheating your oven to 350°F (175°C). This will ensure your granola bars bake evenly and turn golden brown.
- Step 2: Mix the Dry Ingredients – In a large bowl, combine oats, your choice of nuts, dried fruits, and a pinch of salt. Stir them together until well mixed.
- Step 3: Prepare the Wet Mixture – In a small saucepan over low heat, melt butter, honey, and brown sugar. Stir continuously until the mixture is smooth and well combined. Remove from heat and add vanilla extract.
- Step 4: Combine Wet and Dry Ingredients – Pour the warm wet mixture over the dry ingredients. Mix everything together until all the dry ingredients are evenly coated.
- Step 5: Press into the Pan – Line a baking pan with parchment paper. Transfer the mixture into the pan and press it down firmly. This helps the bars hold together.
- Step 6: Bake – Place the pan in the preheated oven and bake for 15–18 minutes. Keep an eye on them until they turn a lovely golden brown.
- Step 7: Cool and Cut – Once baked, let the granola bars cool completely in the pan. After cooling, cut them into bars and store them in an airtight container.
Notes
| Nutrient | Amount per Serving |
|---|---|
| Calories | 200 |
| Fat | 8g |
| Protein | 4g |
| Carbs | 30g |
| Sugar | 10g |
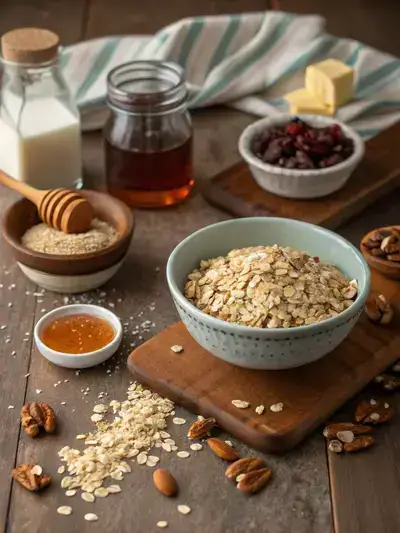
Ingredients
Get ready to whip up some delicious Homemade Granola Bars with these simple ingredients!
- 2 cups rolled oats – the base of the granola, providing texture and fiber
- 1/2 cup chopped nuts – almonds or walnuts add crunch and healthy fats
- 1/2 cup honey – natural sweetener that binds the bars together
- 1/4 cup brown sugar – adds richness and additional sweetness
- 1/4 cup unsalted butter – for a deliciously chewy texture
- 1 tsp vanilla extract – enhances flavor
- 1/4 tsp salt – balances sweetness and enhances flavor
- 1/2 cup dried fruits – raisins or cranberries for natural sweetness and chewiness
How to Make Homemade Granola Bars
Making homemade granola bars is a fun and rewarding experience! With a preparation time of about 10 minutes, cooking time of 15–18 minutes, and a cooling time of at least 30 minutes, you’ll have delicious snacks ready to enjoy in no time.
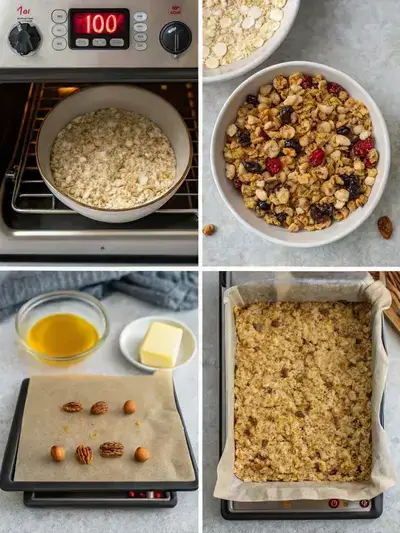
Step 1: Preheat the Oven
Start by preheating your oven to 350°F (175°C). This will ensure your granola bars bake evenly and turn golden brown.
Step 2: Mix the Dry Ingredients
In a large bowl, combine oats, your choice of nuts, dried fruits, and a pinch of salt. Stir them together until well mixed.
Step 3: Prepare the Wet Mixture
In a small saucepan over low heat, melt butter, honey, and brown sugar. Stir continuously until the mixture is smooth and well combined. Remove from heat and add vanilla extract.
Step 4: Combine Wet and Dry Ingredients
Pour the warm wet mixture over the dry ingredients. Mix everything together until all the dry ingredients are evenly coated.
Step 5: Press into the Pan
Line a baking pan with parchment paper. Transfer the mixture into the pan and press it down firmly. This helps the bars hold together.
Step 6: Bake
Place the pan in the preheated oven and bake for 15–18 minutes. Keep an eye on them until they turn a lovely golden brown.
Step 7: Cool and Cut
Once baked, let the granola bars cool completely in the pan. After cooling, cut them into bars and store them in an airtight container.
Recipe Snapshot
| Feature | Details |
|---|---|
| Category | Snack |
| Cuisine | American |
| Prep Time | 10 minutes |
| Cook Time | 18 minutes |
| Extra Time | 30 minutes (cooling) |
| Total Time | 58 minutes |
| Dietary | Vegetarian |
| Serves | 12 |
| Best Served | As a convenient on-the-go snack! |
Pro Tips for Making Homemade Granola Bars
- Experiment with different nut butters for unique flavors.
- Press the mixture firmly into the pan for a sturdy bar.
- Let them cool completely before cutting for clean edges.
- Add a pinch of salt to enhance sweetness.
- Store in an airtight container to keep them fresh longer.
How to Serve this Homemade Granola Bars
- Enjoy them as a quick breakfast or snacks on the go.
- Pair with yogurt and fresh fruit for a delightful snack.
- Crush them over ice cream for a crunchy topping.
- Wrap them in parchment for a perfect lunchbox treat.
- Dip in dark chocolate for an indulgent twist.
- Serve with a side of nut butter for extra protein.
Make Ahead and Storage
Storing and enjoying your Homemade Granola Bars is easy!
Storing Homemade Granola Bars Leftovers
- Allow bars to cool completely before storing.
- Wrap each bar in parchment paper or plastic wrap.
- Place wrapped bars in an airtight container.
- Store at room temperature for up to one week.
Freezing Homemade Granola Bars
- Wrap each bar tightly in plastic wrap.
- Place wrapped bars in a freezer-safe bag or container.
- Label with the date for easy tracking.
- Freeze for up to three months for best quality.
Reheating Homemade Granola Bars
- Remove bars from the fridge or freezer.
- Let them sit at room temperature for about 10 minutes.
- For a warm treat, microwave for 10-15 seconds.
- Enjoy them slightly warm for the best texture!
Explore more easy breakfast recipes, quick lunch ideas, cozy dinner meals, tasty snacks, and delightful dessert.
FAQs
Here’s a helpful FAQ about this recipe:
1. Is it cheaper to make your own granola bars?
Absolutely! Making your own homemade granola bars can be significantly cheaper than buying pre-packaged ones. You can buy ingredients in bulk and customize your bars to your liking, which not only saves money but also allows you to control the quality of the ingredients you use.
2. What helps granola bars stick together?
The key to keeping your homemade granola bars together is using a sticky binder. Ingredients like honey, maple syrup, or nut butter work wonders. They create a cohesive mixture that holds everything together, ensuring your bars don’t crumble apart when you take a bite.
3. What ingredient holds granola bars together?
Typically, nut butter or a syrup like honey or agave is used to bind granola bars. These ingredients not only help the bars stick together but also add flavor and nutritional value, making your homemade granola bars both delicious and nutritious.
4. Are homemade granola bars better for you?
Yes, homemade granola bars are often healthier than store-bought options. You can control the ingredients, avoiding preservatives and added sugars. Plus, you can pack them with nutritious ingredients like nuts, seeds, and dried fruits, making them a wholesome snack choice for you and your family.
Final Thoughts
Making your own Homemade Granola Bars is not just easy; it’s a delightful adventure! Picture the warm, nutty aroma filling your kitchen as you mix and bake. These bars are perfect for a quick snack or a sweet treat on the go. So grab your favorite ingredients, get creative, and enjoy the simple joy of homemade goodness!