

Recipe card
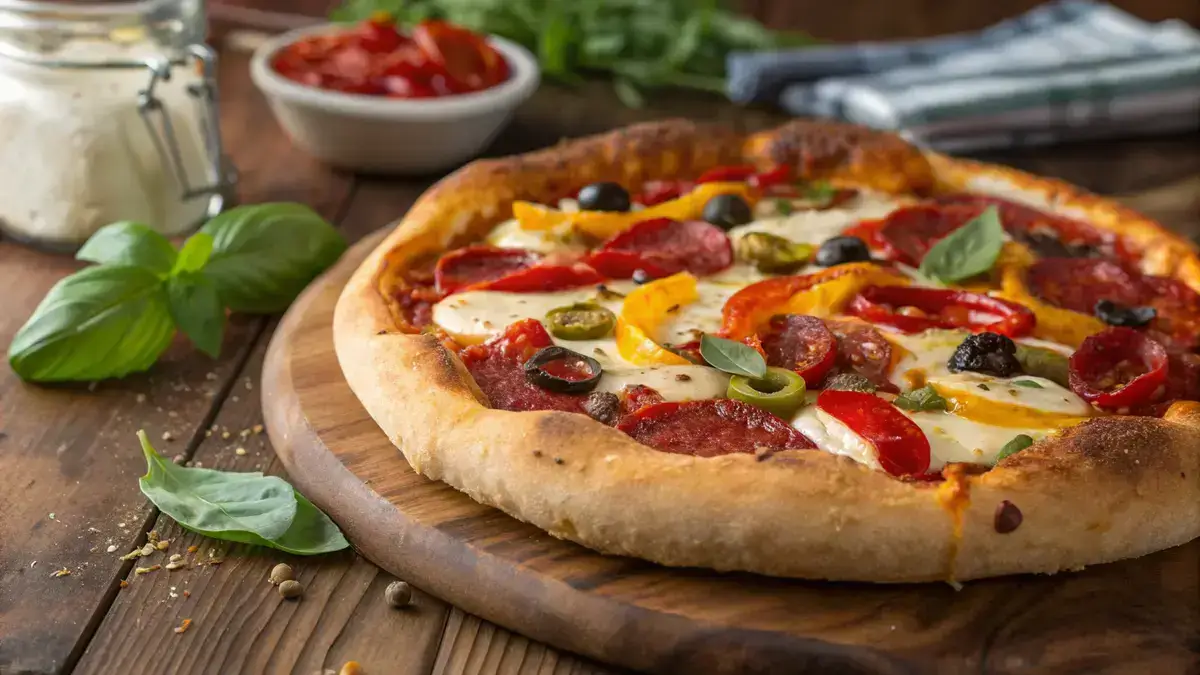
Print / PDFHandmade Pan Pizza
Rate this recipe
Be the first to rate
- Prep Time
- 1 hr 15 mins
- Cook Time
- 20 mins
- Total Time
- 1 hr 35 mins
Ingredients
- 2 cups all-purpose flour (the base for your pizza crust)
- 1 teaspoon active dry yeast (helps the dough rise)
- 1 teaspoon sugar (feeds the yeast for better rising)
- 1 teaspoon salt (enhances flavor)
- 3/4 cup warm water (activates the yeast)
- 1 tablespoon olive oil (adds richness and helps with texture)
- 1/2 cup tomato sauce (the classic pizza base layer)
- 1 cup shredded mozzarella cheese (for that cheesy, gooey goodness)
- to taste Toppings of your choice (pepperoni, bell peppers, onions, mushrooms, etc.)
- as needed Extra olive oil (for greasing the pan)
Equipment
- 1 Round pan or cast-iron skillet — For baking the pizza
- 1 Mixing bowl — For combining ingredients
- 1 Measuring cups and spoons — For accurate ingredient measurements
Method
- 1
In a bowl, combine warm water, sugar, and yeast. Let it sit for 5–10 minutes until frothy.
- 2
Add flour and salt to the yeast mixture. Mix until a soft dough forms.
- 3
Knead the dough on a lightly floured surface for about 5 minutes until smooth and elastic.
- 4
Place the dough in a lightly oiled bowl. Cover and let it rise in a warm place for 1 hour or until doubled in size.
- 5
Preheat your oven to 220°C (430°F).
- 6
Generously oil a round pan or cast-iron skillet with olive oil.
- 7
Press the risen dough into the pan, stretching it to cover the bottom evenly.
- 8
Spread tomato sauce over the dough, then sprinkle with mozzarella cheese and your chosen toppings.
- 9
Bake in the preheated oven for 15–20 minutes, or until the crust is golden and the cheese is bubbly.
- 10
Remove from oven, let cool for 2–3 minutes, slice, and serve hot.
Notes
Why You’ll Love This handmade pan pizza
- It’s perfectly crispy on the outside and soft on the inside.
- Loaded with gooey cheese and your favorite toppings.
- Easy to customize for every taste and dietary need.
- Perfect for sharing with family and friends.
- Made from scratch, it’s a labor of love that’s worth every bite!
Ingredients
Gather these delicious ingredients for your handmade pan pizza!
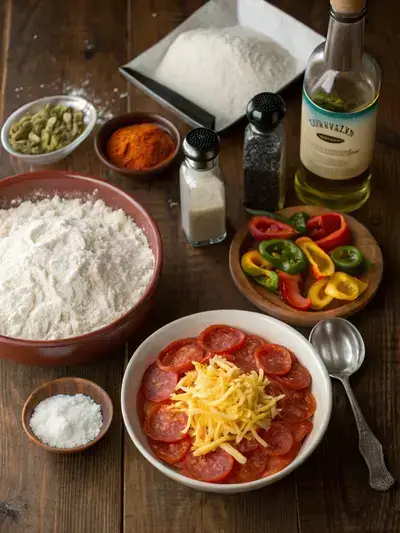
- 2 cups all-purpose flour – the base for your pizza crust
- 1 teaspoon active dry yeast – helps the dough rise
- 1 teaspoon sugar – feeds the yeast for better rising
- 1 teaspoon salt – enhances flavor
- 3/4 cup warm water – activates the yeast
- 1 tablespoon olive oil – adds richness and helps with texture
- 1/2 cup tomato sauce – the classic pizza base layer
- 1 cup shredded mozzarella cheese – for that cheesy, gooey goodness
- Toppings of your choice – pepperoni, bell peppers, onions, mushrooms, etc.
- Extra olive oil – for greasing the pan
How to Make Handmade Pan Pizza
Get ready to create the ultimate handmade pan pizza! With a preparation time of about 1 hour and 15 minutes, including 1 hour for the dough to rise, and a cooking time of 15–20 minutes, you’ll be savoring delicious slices in no time!
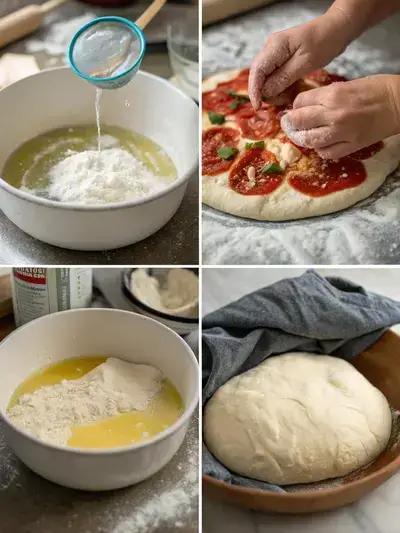
Step 1: Combine Ingredients
In a bowl, combine warm water, sugar, and yeast. Let it sit for 5–10 minutes until frothy.
Step 2: Make the Dough
Add flour and salt to the yeast mixture. Mix until a soft dough forms.
Step 3: Knead the Dough
Knead the dough on a lightly floured surface for about 5 minutes until smooth and elastic.
Step 4: Let it Rise
Place the dough in a lightly oiled bowl. Cover and let it rise in a warm place for 1 hour or until doubled in size.
Step 5: Preheat the Oven
Preheat your oven to 220°C (430°F).
Step 6: Prepare the Pan
Generously oil a round pan or cast-iron skillet with olive oil.
Step 7: Shape the Dough
Press the risen dough into the pan, stretching it to cover the bottom evenly.
Step 8: Add Toppings
Spread tomato sauce over the dough, then sprinkle with mozzarella cheese and your chosen toppings.
Step 9: Bake the Pizza
Bake in the preheated oven for 15–20 minutes, or until the crust is golden and the cheese is bubbly.
Step 10: Serve and Enjoy
Remove from oven, let cool for 2–3 minutes, slice, and serve hot.
Recipe Snapshot
| Feature | Details |
|---|---|
| Category | Main Course |
| Cuisine | Italian |
| Prep Time | 75 minutes |
| Cook Time | 20 minutes |
| Extra Time | 0 minutes |
| Total Time | 95 minutes |
| Dietary | Vegetarian |
| Serves | 8 |
| Best Served | Hot and cheesy, fresh from the oven! |
Pro Tips for Making Handmade Pan Pizza
- Preheat your oven to the highest setting for a crispy crust.
- Use a cast-iron skillet for even heat distribution.
- Let the dough rise in a warm place for a fluffy texture.
- Experiment with different cheeses for unique flavors.
- Don’t overload with toppings; less is more for a perfect bake.
How to Serve this handmade pan pizza
- Slice into generous wedges for sharing.
- Top with fresh basil or arugula for a burst of flavor.
- Serve with a side of marinara or garlic dipping sauce.
- Pair with a refreshing lemonade or iced tea.
- Enjoy with a crisp garden salad for a balanced meal.
- Add a sprinkle of red pepper flakes for a spicy kick.
- Try a drizzle of balsamic glaze for a gourmet touch.
Make Ahead and Storage
Storing and enjoying your handmade pan pizza later is easy!
Storing Leftovers
- Let the pizza cool to room temperature.
- Wrap slices tightly in plastic wrap or aluminum foil.
- Place wrapped slices in an airtight container.
- Store in the refrigerator for up to 3 days.
Freezing
- Cool the pizza completely before freezing.
- Wrap each slice in plastic wrap, then foil.
- Place wrapped slices in a freezer-safe bag or container.
- Freeze for up to 2 months for best quality.
Reheating
- Preheat your oven to 375°F (190°C).
- Place pizza slices on a baking sheet.
- Bake for 10-15 minutes until heated through.
- For a crispy crust, use a pizza stone if available.
Explore more easy breakfast recipes, quick lunch ideas, cozy dinner meals, tasty snacks, and delightful dessert.
Final Thoughts
There you have it, your very own handmade pan pizza! It’s crispy, cheesy, and oh-so-satisfying. Remember, the joy of making this pizza is just as delicious as eating it. So gather your loved ones, share some laughs, and enjoy every bite of this delightful creation. Happy pizza-making!
Quick answers
Frequently asked questions
Straight answers from the kitchen — storage, swaps, and common sticking points for this recipe.
Is handmade pan pizza better than hand tossed?
What is a handmade pan pizza?
What’s the difference between pan pizza and handcrafted pizza?
How to make a handmade pan pizza?
Kitchen notes
Nutrition & sources
Calorie and nutrition figures on this page are estimates meant for general home-cooking guidance. Actual values vary with brands, portion size, and how the recipe is prepared.
Estimates draw on typical ingredient data from public nutrition databases such as the USDA FoodData Central. They are not a substitute for professional medical or dietary advice.
For how recipes are tested and when pages are updated, see How we test recipes. Full legal context lives in our disclaimers and affiliate disclosure.
More to cook
Related Dinner recipes
More cozy favorites from the same kitchen shelf.

dinner
Easy Chicken Recipes
When you need supper that feels like home, chicken recipes are the first place most of us look. A good chicken dinner can be as simple as a weeknight sheet pan or as special as a golden Sunday roast. This guide gathers Grandma Recipe’s best easy chicken recipes by cooking style—baked and roasted, skillet and ground chicken, pasta nights, cozy casseroles, wings, and slow cooker meals—so you can pick a path and cook with confidence.
Continue reading →

dinner
How to Cook Jasmine Rice
Gather these simple kitchen staples for a comforting pot of jasmine rice that is ready to round out just about any meal.
Continue reading →

dinner
Slow Cooker-Style Beef Barbacoa
Gather a few humble ingredients to make this richly flavored barbacoa, with tender beef and plenty of fresh toppings for serving.
Continue reading →
Comments
Made this recipe? Share how it turned out for your family.
No comments yet — be the first to leave a note.