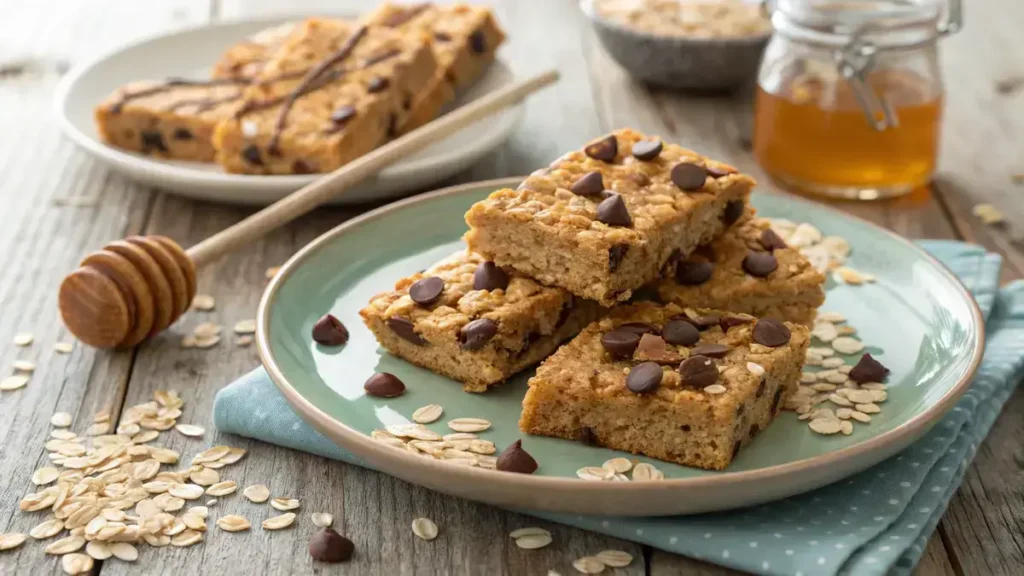
Granola peanut butter bars capture the comfort of sunlit afternoons with the cozy flavor of toasted oats and creamy nut butter. Quick to make and no bake, they combine oats, nuts, honey, and peanut or seed butter into a sturdy yet satisfying treat. Each bite offers a gentle crunch followed by rich, nutty smoothness, dotted with chocolate chips or dried fruit if you like. Perfect for lunchboxes, hikes, or sharing with friends, these bars deliver simple joy in every square.
Table of Contents
Why You’ll Love This granola peanut butter bars
- Perfectly chewy and satisfying for any snack craving.
- Packed with protein and healthy fats to fuel your day.
- Customizable with your favorite nuts and dried fruits.
- No baking required—easy to whip up in minutes!
- Great for meal prep and on-the-go snacking.

granola peanut butter bars
Ingredients
Equipment
Method
- Line an 8×8-inch pan with parchment paper. This will make it easy to lift the bars out later.
- In a saucepan over medium heat, melt butter, honey, and brown sugar until smooth. Stir gently to combine.
- Remove from heat and stir in peanut butter and vanilla until fully combined. The mixture should be creamy and inviting.
- In a large bowl, mix oats and salt. Pour the warm peanut butter mixture over the oats and stir until everything is fully coated.
- Press the mixture firmly into the prepared pan. Make sure it’s packed tightly for the best texture.
- Sprinkle chocolate chips on top and gently press them into the bars. This adds a sweet touch!
- Refrigerate for at least 2 hours or until set. This helps the bars hold their shape.
- Lift the bars out of the pan using the parchment paper and cut into squares. Enjoy your delicious granola peanut butter bars!
Notes
| Nutrient | Amount per Serving |
|---|---|
| Calories | 200 |
| Fat | 10g |
| Protein | 5g |
| Carbs | 25g |
| Sugar | 10g |
Ingredients
Here are the simple ingredients you’ll need to whip up these delicious granola peanut butter bars!
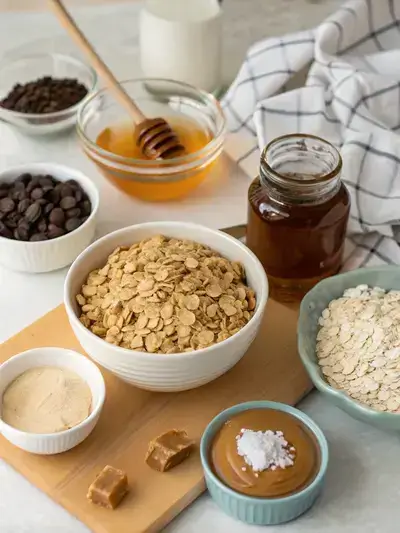
- 2 cups rolled oats – the base for our bars
- 1/2 cup natural peanut butter – creamy and flavorful
- 1/3 cup honey – adds natural sweetness
- 1/4 cup brown sugar – enhances the flavor
- 2 tablespoons unsalted butter – helps bind the bars
- 1 teaspoon vanilla extract – adds a hint of warmth
- pinch of salt – balances the sweetness
- 1/2 cup chocolate chips (optional) – for a delicious twist
How to Make granola peanut butter bars
These granola peanut butter bars are a delightful no-bake snack. With a preparation time of 10 minutes, a cooking time of 5 minutes, and a chilling time of at least 2 hours, you’ll have a healthy treat ready to enjoy!
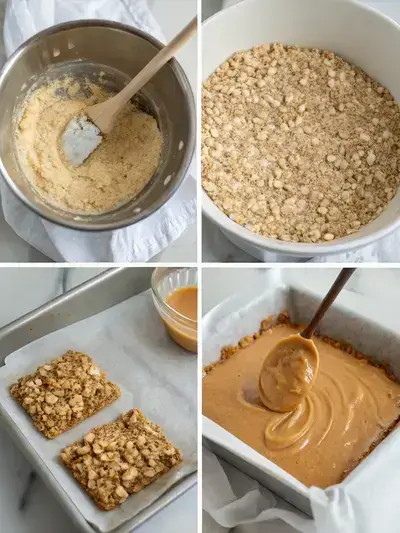
Step 1: Line the Pan
Line an 8×8-inch pan with parchment paper. This will make it easy to lift the bars out later.
Step 2: Melt the Mixture
In a saucepan over medium heat, melt butter, honey, and brown sugar until smooth. Stir gently to combine.
Step 3: Add Peanut Butter
Remove from heat and stir in peanut butter and vanilla until fully combined. The mixture should be creamy and inviting.
Step 4: Mix with Oats
In a large bowl, mix oats and salt. Pour the warm peanut butter mixture over the oats and stir until everything is fully coated.
Step 5: Press into the Pan
Press the mixture firmly into the prepared pan. Make sure it’s packed tightly for the best texture.
Step 6: Add Chocolate Chips
Sprinkle chocolate chips on top and gently press them into the bars. This adds a sweet touch!
Step 7: Chill the Bars
Refrigerate for at least 2 hours or until set. This helps the bars hold their shape.
Step 8: Cut and Enjoy
Lift the bars out of the pan using the parchment paper and cut into squares. Enjoy your delicious granola peanut butter bars!
Recipe Snapshot
| Feature | Details |
|---|---|
| Category | Snack |
| Cuisine | American |
| Prep Time | 10 minutes |
| Cook Time | 5 minutes |
| Extra Time | 120 minutes (resting) |
| Total Time | 135 minutes |
| Dietary | Vegetarian |
| Serves | 12 |
| Best Served | Chilled and cut into squares! |
Pro Tips for Making granola peanut butter bars
- Opt for natural peanut butter for a creamier texture.
- Chill the mixture before cutting for cleaner bars.
- Add a pinch of salt to enhance the flavors.
- Experiment with mix-ins like dried fruits or seeds.
How to Serve this granola peanut butter bars
- Enjoy them as a quick breakfast on the go.
- Pair with fresh fruit like bananas or berries for a nutritious snack.
- Crush them and sprinkle over yogurt for added crunch.
- Dip in dark chocolate for a sweet treat.
- Pack them in lunchboxes for a healthy midday boost.
- Serve with a glass of almond milk for a delightful combo.
Make Ahead and Storage
Here’s how to keep your granola peanut butter bars fresh and delicious:
Storing Leftovers
- Store in an airtight container.
- Keep in a cool, dry place for up to a week.
- For longer freshness, refrigerate.
Freezing
- Wrap bars individually in plastic wrap.
- Place in a freezer-safe bag or container.
- Label with the date and freeze for up to 3 months.
Reheating
- Thaw in the refrigerator overnight.
- For a warm treat, microwave for 10-15 seconds.
- Enjoy them at room temperature for best texture.
Explore more easy breakfast recipes, quick lunch ideas, cozy dinner meals, tasty snacks, and delightful dessert.
FAQs
Here’s a helpful FAQ about this recipe:
1. What ingredients are needed to make granola peanut butter bars?
To make delicious granola peanut butter bars, you will need rolled oats, peanut butter (or a nut butter of your choice), honey or maple syrup, vanilla extract, and any mix-ins you like such as nuts, seeds, or dried fruit. These ingredients come together to create a wholesome and satisfying snack!
2. What is the step-by-step process for preparing granola peanut butter bars?
To prepare your granola peanut butter bars, start by mixing the peanut butter and honey in a bowl until smooth. Then, add the rolled oats and any mix-ins, stirring until everything is well combined. Press the mixture into a lined baking dish, refrigerate until firm, and then cut into bars. It’s that simple!
3. Can I make granola peanut butter bars vegan or gluten-free?
Absolutely! To make your granola peanut butter bars vegan, simply use maple syrup instead of honey. For a gluten-free version, ensure that you use certified gluten-free oats. This way, everyone can enjoy these tasty bars!
4. How should I store granola peanut butter bars to keep them fresh?
To keep your granola peanut butter bars fresh, store them in an airtight container in the refrigerator. They can last up to a week this way. If you want to keep them longer, consider freezing them, and just thaw them when you’re ready to enjoy!
Final Thoughts
These granola peanut butter bars are not just a treat; they’re a delightful trip down memory lane! Whip them up in no time and enjoy a snack that’s both satisfying and wholesome. Perfect for sharing or savoring solo, you’ll love how easy and rewarding this recipe is. So grab your ingredients and let the fun begin!