

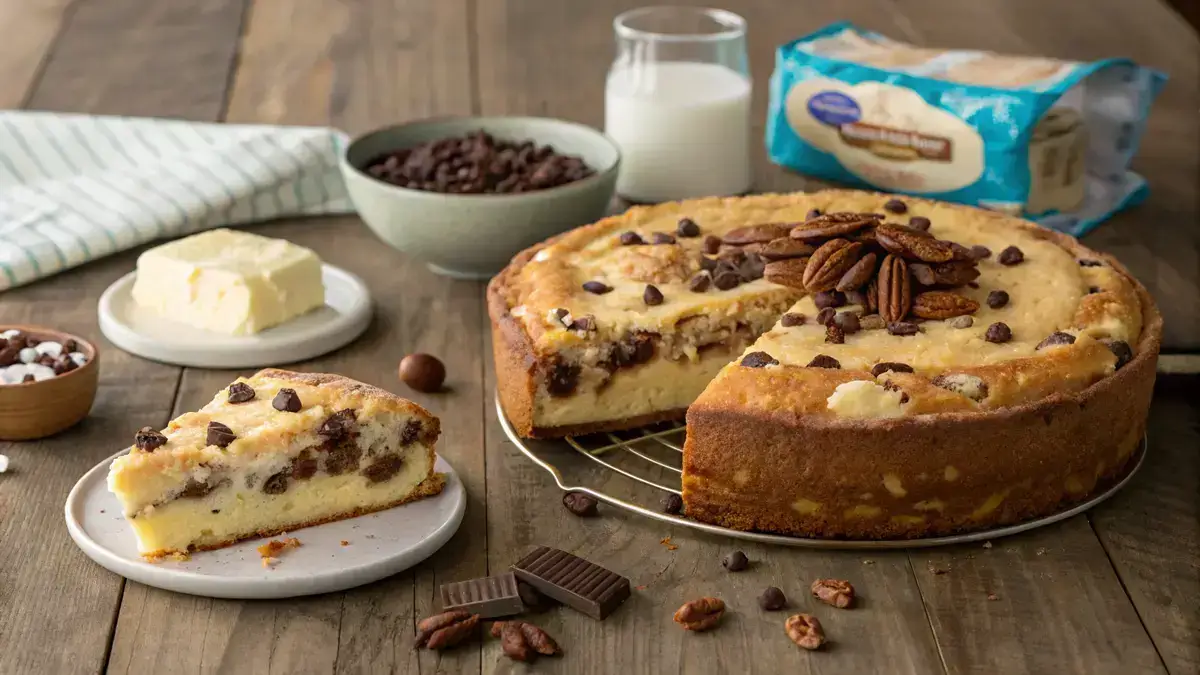
Recipe card
Print / PDFEarthquake Cake
Rate this recipe
Be the first to rate
- Prep Time
- 15 mins
- Cook Time
- 40 mins
- Total Time
- 55 mins
Ingredients
- 1 box yellow cake mix (for a fluffy base)
- 1 stick (½ cup) unsalted butter (adds richness)
- 8 oz cream cheese (room temperature, for creamy texture)
- ¼ cup granulated sugar (sweetens the cream cheese layer)
- 2 large eggs (binds the ingredients)
- 1 tsp vanilla extract (enhances flavor)
- 1 cup sour cream (makes it moist)
- ½ cup powdered sugar (for cream cheese frosting)
- ¼ cup milk (adjusts frosting consistency)
- 1 cup semi-sweet chocolate chips (indulgent addition)
- 1 cup chopped pecans (optional for crunch)
Equipment
- 1 9×13-inch baking dish — For baking the cake.
- 1 Saucepan — For melting the butter.
Method
- 1
Preheat your oven to 350°F (175°C). Grease a 9×13-inch baking dish to ensure your cake comes out easily.
- 2
Melt the butter in a saucepan. Once melted, pour it into the greased baking dish, spreading it evenly across the bottom.
- 3
Sprinkle the dry cake mix evenly over the melted butter. Do not mix it; just let it sit there for now.
- 4
Pop the dish into the oven and bake for 10 minutes. This will give your cake a nice start!
- 5
While the cake is baking, beat the cream cheese and granulated sugar together until smooth. Add the eggs one at a time, mixing well after each addition, then stir in the vanilla extract.
- 6
Drop spoonfuls of the cream cheese mixture over the partially baked cake. Don’t worry about making it perfect; it will all come together!
- 7
Sprinkle sour cream and powdered sugar on top of the cream cheese mixture. Gently spread it out to cover as much as you can.
- 8
Pour milk over the top of the cake. Then sprinkle with chocolate chips and pecans for that extra crunch and flavor!
- 9
Return the dish to the oven and bake for an additional 25–30 minutes. You’ll know it’s done when the edges are golden and the center is set.
- 10
Let the cake cool completely before slicing and serving. Enjoy your delicious Earthquake Cake!
Notes
| Nutrient | Amount per Serving |
|---|---|
| Nutrition Facts | Per Serving |
| Calories | 350 |
| Fat | 20g |
| Protein | 5g |
| Carbs | 40g |
Why You’ll Love This EARTHQUAKE CAKE
- Decadent layers of chocolate and coconut create a flavor explosion.
- Easy to make, perfect for both novice and experienced bakers.
- Each slice is a delightful surprise with its gooey cream cheese center.
- Great for gatherings, it’s sure to impress your friends and family.
- Versatile enough to customize with your favorite nuts or toppings.
Ingredients
Gather these simple ingredients to whip up a delicious Earthquake Cake!
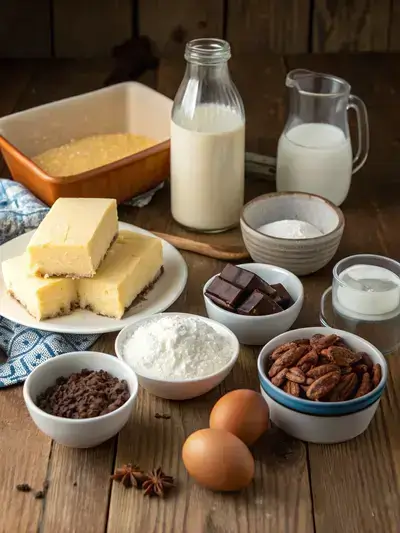
- 1 box yellow cake mix – for a fluffy base
- 1 stick (½ cup) unsalted butter – adds richness
- 8 oz cream cheese – room temperature, for creamy texture
- ¼ cup granulated sugar – sweetens the cream cheese layer
- 2 large eggs – binds the ingredients
- 1 tsp vanilla extract – enhances flavor
- 1 cup sour cream – makes it moist
- ½ cup powdered sugar – for cream cheese frosting
- ¼ cup milk – adjusts frosting consistency
- 1 cup semi-sweet chocolate chips – indulgent addition
- 1 cup chopped pecans – optional for crunch
How to Make EARTHQUAKE CAKE
Get ready for a delightful baking adventure! This Earthquake Cake is a fun and delicious treat that will impress everyone. With a preparation time of about 15 minutes, cooking time of 35–40 minutes, and a cooling time to let those flavors meld, you’ll be enjoying this cake in no time!

Step 1: Preheat the Oven
Preheat your oven to 350°F (175°C). Grease a 9×13-inch baking dish to ensure your cake comes out easily.
Step 2: Melt the Butter
Melt the butter in a saucepan. Once melted, pour it into the greased baking dish, spreading it evenly across the bottom.
Step 3: Add the Cake Mix
Sprinkle the dry cake mix evenly over the melted butter. Do not mix it; just let it sit there for now.
Step 4: Bake for 10 Minutes
Pop the dish into the oven and bake for 10 minutes. This will give your cake a nice start!
Step 5: Prepare the Cream Cheese Mixture
While the cake is baking, beat the cream cheese and granulated sugar together until smooth. Add the eggs one at a time, mixing well after each addition, then stir in the vanilla extract.
Step 6: Add the Cream Cheese Mixture
Drop spoonfuls of the cream cheese mixture over the partially baked cake. Don’t worry about making it perfect; it will all come together!
Step 7: Sprinkle and Spread
Sprinkle sour cream and powdered sugar on top of the cream cheese mixture. Gently spread it out to cover as much as you can.
Step 8: Add Milk and Toppings
Pour milk over the top of the cake. Then sprinkle with chocolate chips and pecans for that extra crunch and flavor!
Step 9: Bake Again
Return the dish to the oven and bake for an additional 25–30 minutes. You’ll know it’s done when the edges are golden and the center is set.
Step 10: Cool and Serve
Let the cake cool completely before slicing and serving. Enjoy your delicious Earthquake Cake!
Recipe Snapshot
| Feature | Details |
|---|---|
| Category | Dessert |
| Cuisine | American |
| Prep Time | 15 minutes |
| Cook Time | 40 minutes |
| Extra Time | 0 minutes |
| Total Time | 55 minutes |
| Dietary | Vegetarian |
| Serves | 12 |
| Best Served | Chilled or at room temperature |
Pro Tips for Making EARTHQUAKE CAKE
- Use ripe bananas for extra sweetness.
- Make the layers even for better presentation.
- Use a cold metal bowl to whip ingredients more quickly.
- Garnish just before serving to keep it fresh.
How to Serve this EARTHQUAKE CAKE
- Serve warm with a scoop of vanilla ice cream on top.
- Drizzle with chocolate or caramel sauce for extra indulgence.
- Pair with fresh berries for a refreshing contrast.
- Enjoy with a dollop of whipped cream and a sprinkle of nuts.
- Serve alongside a cup of hot coffee or herbal tea for a cozy treat.
Make Ahead and Storage
You can make this cake ahead and store it easily:
Storing EARTHQUAKE CAKE Leftovers
- Allow the cake to cool completely.
- Wrap it tightly in plastic wrap.
- Store in an airtight container.
- Keep in the refrigerator for up to 5 days.
Freezing EARTHQUAKE CAKE
- Wrap the cooled cake in plastic wrap.
- Then wrap it in aluminum foil for extra protection.
- Label with the date and type of cake.
- Freeze for up to 3 months.
Reheating EARTHQUAKE CAKE
- Thaw the cake in the refrigerator overnight.
- For a warm slice, microwave for 15-20 seconds.
- Alternatively, reheat in a preheated oven at 350°F for 10-15 minutes.
- Enjoy with a scoop of ice cream for extra delight!
Explore more easy breakfast recipes, quick lunch ideas, cozy dinner meals, tasty snacks, and delightful dessert.
Final Thoughts
Earthquake Cake is not just a dessert; it’s a delightful experience that brings joy to any gathering! With its rich flavors and delightful textures, this cake is a breeze to make and a joy to share. So grab your ingredients, unleash your inner baker, and enjoy every delicious bite of this unforgettable treat!
Quick answers
Frequently asked questions
Straight answers from the kitchen — storage, swaps, and common sticking points for this recipe.
What is an earthquake cake?
How do you make earthquake cake?
What does earthquake cake taste like?
Does earthquake cake need to be refrigerated?
Kitchen notes
Nutrition & sources
Calorie and nutrition figures on this page are estimates meant for general home-cooking guidance. Actual values vary with brands, portion size, and how the recipe is prepared.
Estimates draw on typical ingredient data from public nutrition databases such as the USDA FoodData Central. They are not a substitute for professional medical or dietary advice.
For how recipes are tested and when pages are updated, see How we test recipes. Full legal context lives in our disclaimers and affiliate disclosure.


Comments
Made this recipe? Share how it turned out for your family.
No comments yet — be the first to leave a note.