

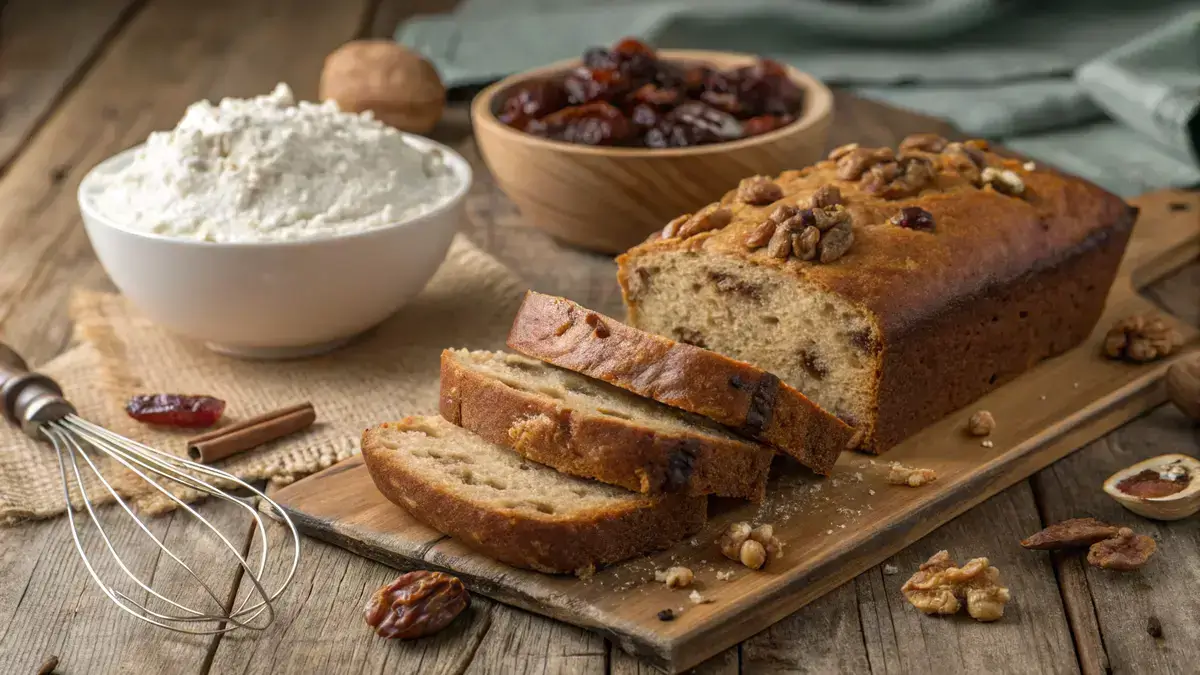
Recipe card
Print / PDFDate Nut Bread
Rate this recipe
Be the first to rate
- Prep Time
- 15 mins
- Cook Time
- 1 hr
- cooling
- 10 mins
- Total Time
- 1 hr 25 mins
Ingredients
- 1 cup chopped dates (for natural sweetness)
- 1 teaspoon baking soda (helps the bread rise)
- 1/4 cup hot water (to soften the dates)
- 1 1/2 cups all-purpose flour (the main base)
- 1/2 teaspoon salt (enhances flavor)
- 1 teaspoon baking powder (gives additional lift)
- 1/2 teaspoon ground cinnamon (for a warm spice note)
- 1/2 cup granulated sugar (for sweetness)
- 1/4 cup brown sugar (adds moisture and rich flavor)
- 1/2 cup melted butter (for richness)
- 2 large eggs (binds everything together)
- 1 teaspoon vanilla extract (for added depth of flavor)
- 1/2 cup chopped walnuts (for crunch and nuttiness)
Equipment
- 1 9×5-inch loaf pan — Greased and floured for easy removal
- 1 Mixing bowls — For combining ingredients
- 1 whisk — For mixing dry ingredients
- 1 Spatula — For folding ingredients together
Method
- 1
Preheat your oven to 350°F (175°C). Grease and flour a 9×5-inch loaf pan to ensure your bread comes out easily.
- 2
In a small bowl, place the chopped dates. Sprinkle them with baking soda and pour hot water over them. Let this mixture stand for 10 minutes, then mash it lightly.
- 3
In a medium bowl, whisk together the flour, salt, baking powder, and cinnamon. This will be your dry mixture.
- 4
In a large bowl, beat together the granulated sugar, brown sugar, and melted butter until smooth and creamy.
- 5
Add the eggs one at a time, beating well after each addition. Stir in the vanilla extract for that lovely aroma.
- 6
Gently fold the date mixture into the wet ingredients, making sure everything is well combined.
- 7
Gradually add the dry ingredients to the wet mixture, mixing just until combined. Be careful not to overmix!
- 8
Gently fold in the chopped walnuts for that extra crunch and flavor.
- 9
Pour the batter into the prepared loaf pan and smooth the top. Bake for 50–60 minutes, or until a toothpick inserted into the center comes out clean.
- 10
Allow the bread to cool in the pan for 10 minutes. Then, transfer it to a wire rack to cool completely before slicing. Enjoy your homemade date nut bread!
Notes
| Nutrient | Amount per Serving |
|---|---|
| Calories | 200 |
| Fat | 8g |
| Protein | 3g |
| Carbs | 30g |
| Sugar | 15g |
| Fiber | 2g |
Why You’ll Love This date nut bread
- It’s a delightful blend of sweet dates and crunchy nuts.
- Perfect for breakfast or a cozy afternoon snack.
- Packed with fiber and nutrients for a healthy boost.
- Easy to make with simple, wholesome ingredients.
- Fills your home with an irresistible aroma while baking.
Ingredients
Gather these simple yet delightful ingredients for your homemade date nut bread!
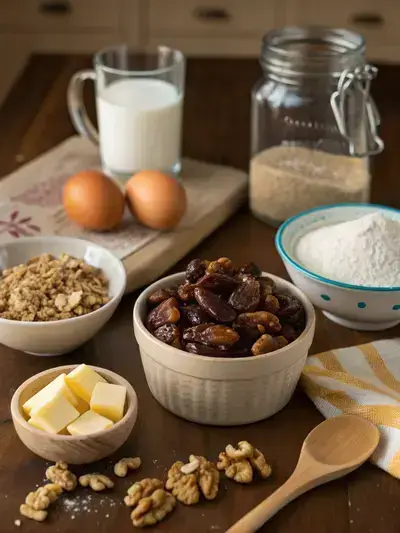
- 1 cup chopped dates – for natural sweetness
- 1 teaspoon baking soda – helps the bread rise
- 1/4 cup hot water – to soften the dates
- 1 1/2 cups all-purpose flour – the main base
- 1/2 teaspoon salt – enhances flavor
- 1 teaspoon baking powder – gives additional lift
- 1/2 teaspoon ground cinnamon – for a warm spice note
- 1/2 cup granulated sugar – for sweetness
- 1/4 cup brown sugar – adds moisture and rich flavor
- 1/2 cup melted butter – for richness
- 2 large eggs – binds everything together
- 1 teaspoon vanilla extract – for added depth of flavor
- 1/2 cup chopped walnuts– for crunch and nuttiness
How to Make Date Nut Bread
This delightful date nut bread is perfect for breakfast or a snack. With a preparation time of about 15 minutes and a cooking time of 50–60 minutes, you’ll have a warm, homemade treat ready to enjoy. Allow for an additional 10 minutes of cooling time before slicing into this delicious loaf!
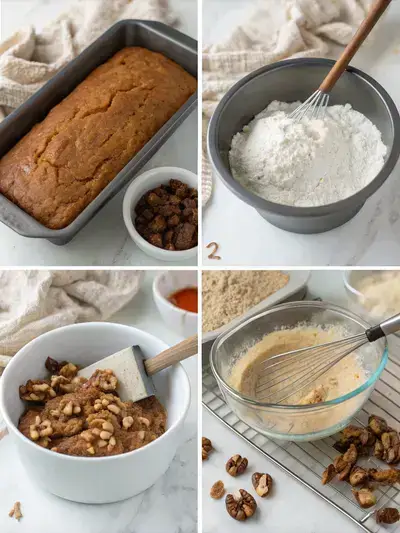
Step 1: Preheat the Oven
Preheat your oven to 350°F (175°C). Grease and flour a 9×5-inch loaf pan to ensure your bread comes out easily.
Step 2: Prepare the Dates
In a small bowl, place the chopped dates. Sprinkle them with baking soda and pour hot water over them. Let this mixture stand for 10 minutes, then mash it lightly.
Step 3: Mix Dry Ingredients
In a medium bowl, whisk together the flour, salt, baking powder, and cinnamon. This will be your dry mixture.
Step 4: Combine Wet Ingredients
In a large bowl, beat together the granulated sugar, brown sugar, and melted butter until smooth and creamy.
Step 5: Add Eggs and Vanilla
Add the eggs one at a time, beating well after each addition. Stir in the vanilla extract for that lovely aroma.
Step 6: Fold in Dates
Gently fold the date mixture into the wet ingredients, making sure everything is well combined.
Step 7: Combine Mixtures
Gradually add the dry ingredients to the wet mixture, mixing just until combined. Be careful not to overmix!
Step 8: Add Walnuts
Gently fold in the chopped walnuts for that extra crunch and flavor.
Step 9: Bake the Bread
Pour the batter into the prepared loaf pan and smooth the top. Bake for 50–60 minutes, or until a toothpick inserted into the center comes out clean.
Step 10: Cool and Slice
Allow the bread to cool in the pan for 10 minutes. Then, transfer it to a wire rack to cool completely before slicing. Enjoy your homemade date nut bread!
Recipe Snapshot
| Feature | Details |
|---|---|
| Category | Breakfast |
| Cuisine | American |
| Prep Time | 15 minutes |
| Cook Time | 60 minutes |
| Extra Time | 10 minutes (cooling) |
| Total Time | 85 minutes |
| Dietary | Vegetarian |
| Serves | 12 |
| Best Served | Warm with butter |
Pro Tips for Making Date Nut Bread
- Choose fresh, pitted dates for the best flavor.
- Soak dates in warm water for 10 minutes to soften them.
- Mix dry and wet ingredients separately for a smoother batter.
- Don’t overmix; a few lumps are okay for a tender loaf.
- Let the bread cool completely before slicing for cleaner cuts.
How to Serve this date nut bread
- Spread a layer of cream cheese for a rich, tangy contrast.
- Top with a drizzle of honey or maple syrup for added sweetness.
- Serve warm with a pat of butter for a cozy treat.
- Pair with a cup of herbal tea or coffee for a delightful afternoon snack.
- Enjoy as a breakfast toast topped with sliced bananas or berries.
- Slice and serve with a side of yogurt for a balanced meal.
Make Ahead and Storage
You can prepare and store your date nut bread for later enjoyment:
Storing Leftovers
- Allow the bread to cool completely.
- Wrap it tightly in plastic wrap or aluminum foil.
- Store in an airtight container at room temperature for up to 3 days.
- For longer storage, refrigerate for up to a week.
Freezing
- Wrap the cooled bread in plastic wrap, then in foil.
- Label with the date and type of bread.
- Freeze for up to 3 months for best quality.
- Thaw in the refrigerator overnight before using.
Reheating
- Preheat your oven to 350°F (175°C).
- Wrap the bread in foil to prevent drying out.
- Heat for about 10-15 minutes until warmed through.
- For individual slices, microwave for 15-20 seconds.
Explore more easy breakfast recipes, quick lunch ideas, cozy dinner meals, tasty snacks, and delightful dessert.
Final Thoughts
Now that you’ve mastered the art of making date nut bread, it’s time to savor every delicious bite! This simple yet rewarding recipe is perfect for sharing with loved ones or enjoying with a warm cup of tea. So, roll up your sleeves, get baking, and let the sweet aroma fill your home. Happy baking!
Quick answers
Frequently asked questions
Straight answers from the kitchen — storage, swaps, and common sticking points for this recipe.
Is date nut bread healthy?
Where did date nut bread originate?
How long does date nut bread last?
What ingredients are typically in date nut bread?
Kitchen notes
Nutrition & sources
Calorie and nutrition figures on this page are estimates meant for general home-cooking guidance. Actual values vary with brands, portion size, and how the recipe is prepared.
Estimates draw on typical ingredient data from public nutrition databases such as the USDA FoodData Central. They are not a substitute for professional medical or dietary advice.
For how recipes are tested and when pages are updated, see How we test recipes. Full legal context lives in our disclaimers and affiliate disclosure.


Comments
Made this recipe? Share how it turned out for your family.
No comments yet — be the first to leave a note.