

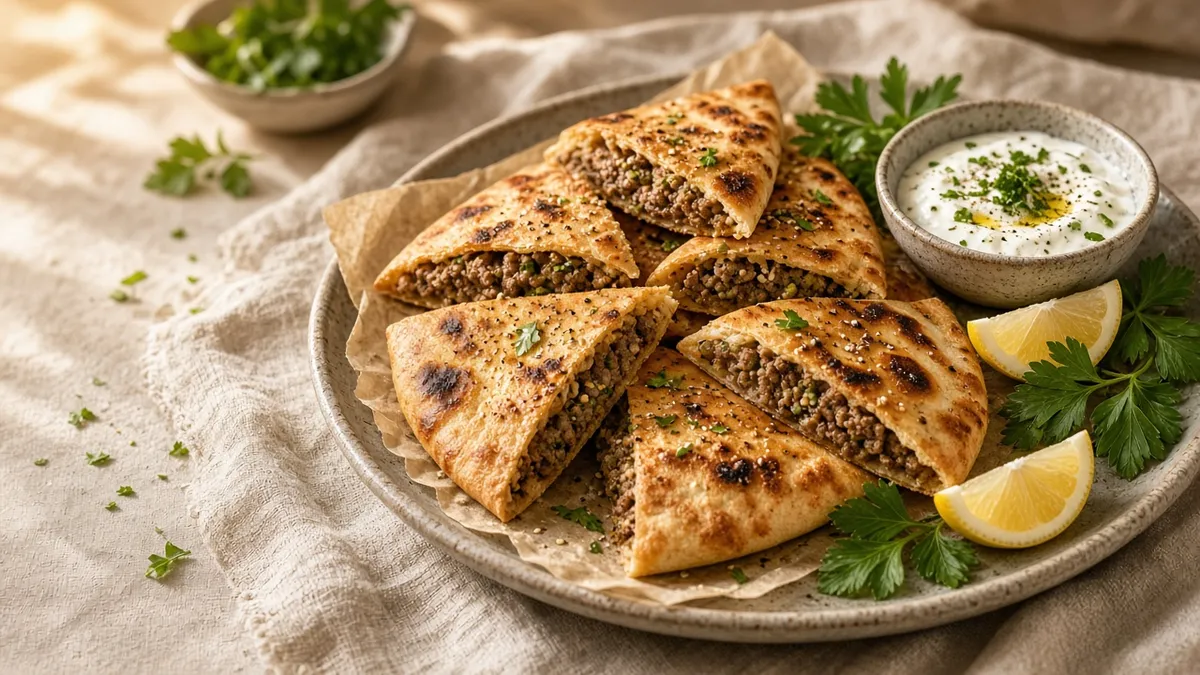
Recipe card
Print / PDFCrispy Homemade Arayes
Rate this recipe
Be the first to rate
- Prep Time
- 20 mins
- Cook Time
- 20 mins
- Extra Time
- 5 mins
- Total Time
- 40 mins
Ingredients
- 1 pound lean ground beef
- 1 small yellow onion, finely grated
- 1/4 cup finely chopped fresh parsley
- 2 garlic cloves, minced
- 1 teaspoon ground cumin
- 1 teaspoon ground coriander
- 1/2 teaspoon ground allspice
- 1/2 teaspoon paprika
- 1 teaspoon kosher salt
- 1/4 teaspoon black pepper
- 4 small round pita breads
- 2 tablespoons olive oil
Equipment
- Large baking sheet — Use a rimmed sheet to catch any juices.
- Parchment paper — Helps prevent sticking and makes cleanup easier.
- Mixing bowl — Choose a medium or large bowl for combining the filling.
- Chef's knife — Use it to halve the pita breads.
- Instant-read thermometer — Check that the ground beef reaches 160°F.
Method
- 1
Preheat the oven to 425°F.
- 2
Line a large baking sheet with parchment paper.
- 3
Combine the ground beef, onion, parsley, garlic, cumin, coriander, allspice, paprika, salt, and pepper in a mixing bowl.
- 4
Mix the filling until the seasonings are evenly distributed.
- 5
Cut each pita bread in half.
- 6
Open each pita half to form a pocket.
- 7
Spread a thin layer of meat filling inside each pita pocket.
- 8
Brush both sides of each stuffed pita with olive oil.
- 9
Arrange the arayes on the prepared baking sheet.
- 10
Bake the arayes for 12 minutes.
- 11
Turn the arayes over.
- 12
Bake the arayes for 8 more minutes.
- 13
Check that the center of the filling reaches 160°F.
- 14
Rest the arayes for 5 minutes before serving.
Notes
| Nutrient | Amount per Serving |
|---|---|
| Calories | 430 |
| Fat | 22g |
| Protein | 27g |
| Carbs | 34g |
Why You'll Love This Arayes
- Golden pita shells turn crisp and delicious in the oven.
- The warmly spiced beef filling is savory, tender, and full of Middle Eastern flavor.
- Simple ingredients make this a friendly recipe for a family appetizer.
- Arayes are easy to prepare ahead and bake when everyone is ready to eat.
- Each little pita pocket is perfect for dipping and sharing.
Ingredients
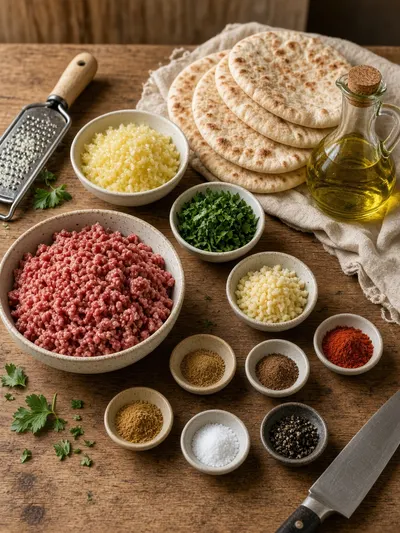
Gather a few fresh ingredients and fragrant spices to make these crispy arayes. The grated onion helps keep the beef filling tender while the pita bakes to a lovely golden finish.
- Lean ground beef - 1 pound
- Yellow onion - 1 small, finely grated
- Fresh parsley - 1/4 cup, finely chopped
- Garlic cloves - 2, minced
- Ground cumin - 1 teaspoon
- Ground coriander - 1 teaspoon
- Ground allspice - 1/2 teaspoon
- Paprika - 1/2 teaspoon
- Kosher salt - 1 teaspoon
- Black pepper - 1/4 teaspoon
- Small round pita breads - 4
- Olive oil - 2 tablespoons
How to Make Arayes
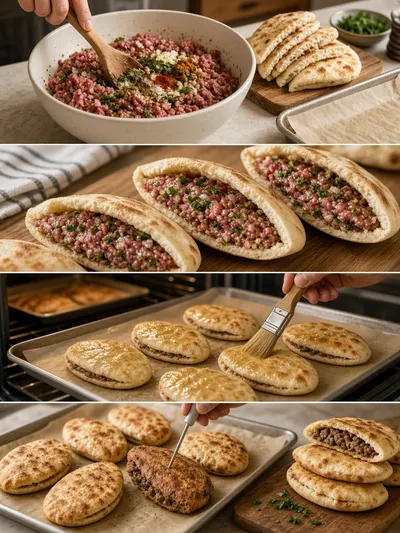
Set aside 20 minutes for prep, then bake the arayes for 20 minutes. Let them rest for 5 minutes before serving so the filling settles and the pita is comfortable to handle.
Step 1: Preheat the Oven
Preheat the oven to 425°F. A fully heated oven helps the pita become crisp while the beef cooks evenly.
Step 2: Prepare the Baking Sheet
Line a large baking sheet with parchment paper. This makes cleanup simple and keeps the stuffed pita from sticking.
Step 3: Combine the Filling
Place the ground beef, onion, parsley, garlic, cumin, coriander, allspice, paprika, salt, and pepper in a mixing bowl.
Step 4: Mix the Seasonings
Mix the filling until the seasonings are evenly distributed. Use a light touch and stop as soon as everything is combined.
Step 5: Cut the Pitas
Cut each pita bread in half. You will have eight pita halves ready to fill.
Step 6: Open the Pockets
Gently open each pita half to form a pocket. Take care not to tear the bread, since the pocket will hold the meat mixture as it bakes.
Step 7: Fill the Pitas
Spread a thin layer of meat filling inside each pita pocket. Keep the filling even and not too thick so it cooks through in the oven.
Step 8: Brush with Olive Oil
Brush both sides of each stuffed pita with olive oil. A light coating helps the bread brown and crisp beautifully.
Step 9: Arrange the Arayes
Arrange the arayes on the prepared baking sheet. Leave a little space between them so the hot air can circulate.
Step 10: Bake the First Side
Bake the arayes for 12 minutes. The pita should begin to turn golden and crisp.
Step 11: Turn the Arayes
Carefully turn the arayes over with tongs or a spatula. This helps both sides cook evenly.
Step 12: Finish Baking
Bake the arayes for 8 more minutes. Continue until the pita is crisp and the filling is fully cooked.
Step 13: Check the Temperature
Check that the center of the filling reaches 160°F. Insert an instant-read thermometer into the thickest part of the filling for an accurate reading.
Step 14: Rest Before Serving
Rest the arayes for 5 minutes before serving. This brief rest lets the filling settle and makes the pockets easier to enjoy.
Recipe Snapshot
| Feature | Details |
|---|---|
| Category/Course | Snacks, Appetizer |
| Cuisine | Middle Eastern |
| Prep Time | 20 minutes |
| Cook Time | 20 minutes |
| Extra Time | 5 minutes resting |
| Total Time | 40 minutes, plus resting |
| Dietary | High-protein |
| Serves | 4 |
| Best Served | Warm with a cool, creamy dip |
Pro Tips for Making Arayes
- Grate the onion finely so it blends into the beef and adds moisture without making the filling chunky.
- Keep the filling layer thin and even to help the center cook at the same time as the pita crisps.
- Open the pita pockets gently, especially if the bread is delicate or a little dry.
- Use an instant-read thermometer to confirm the beef reaches 160°F before serving.
- Let the arayes rest briefly after baking so the hot filling is easier to handle.
How to Serve Arayes
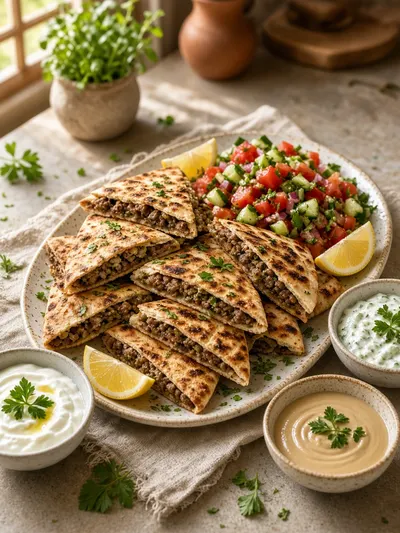
- Serve the warm arayes with plain yogurt, tahini sauce, or a cooling cucumber dip.
- Add a simple salad of chopped tomatoes, cucumbers, parsley, and lemon.
- Arrange them on a platter with lemon wedges for squeezing over the top.
- Cut the pita pockets into smaller pieces for a party tray or family snack.
Make Ahead and Storage
Storing Leftovers
- Cool leftover arayes promptly, then place them in an airtight container in the refrigerator.
- Enjoy refrigerated leftovers within 3 days for the best texture and flavor.
- Keep dips and fresh toppings in separate containers until serving.
Freezing
- Freeze assembled, unbaked arayes in a single layer until firm, then transfer them to a freezer-safe container.
- For best quality, use frozen arayes within 2 months.
- Thaw them in the refrigerator before baking, and check the center reaches 160°F.
Reheating
- Reheat refrigerated arayes in a 375°F oven until hot and crisp, usually about 10 to 12 minutes.
- Avoid microwaving when possible, since it can soften the pita.
- Let reheated arayes sit for a minute or two before serving.
Explore more easy breakfast recipes, quick lunch ideas, cozy dinner meals, tasty snacks, and delightful dessert.
Final Thoughts
These crispy homemade arayes bring a little warmth and togetherness to the table, one golden pita pocket at a time.
FAQs
Here are a few helpful answers for making and serving this family-friendly appetizer.
Can I use a different type of ground meat?
Yes, you can use another ground meat if you prefer, but cook it to the safe internal temperature recommended for that meat. The flavor and texture may vary.
How do I keep the pita from tearing?
Open each pita half slowly with your fingers, starting at the cut edge. If the bread feels dry, warming it briefly can make it more flexible.
Can I prepare arayes ahead of time?
Yes, you can fill the pita pockets and refrigerate them covered until you are ready to brush them with oil and bake. Bake them within 24 hours for the best results.
What can I serve with arayes?
Arayes are lovely with yogurt, tahini sauce, fresh salad, lemon wedges, or crisp vegetables. A small platter of dips makes them especially welcoming for guests.
Kitchen notes
Nutrition & sources
Calorie and nutrition figures on this page are estimates meant for general home-cooking guidance. Actual values vary with brands, portion size, and how the recipe is prepared.
Estimates draw on typical ingredient data from public nutrition databases such as the USDA FoodData Central. They are not a substitute for professional medical or dietary advice.
For how recipes are tested and when pages are updated, see How we test recipes. Full legal context lives in our disclaimers and affiliate disclosure.


Comments
Made this recipe? Share how it turned out for your family.
No comments yet — be the first to leave a note.