

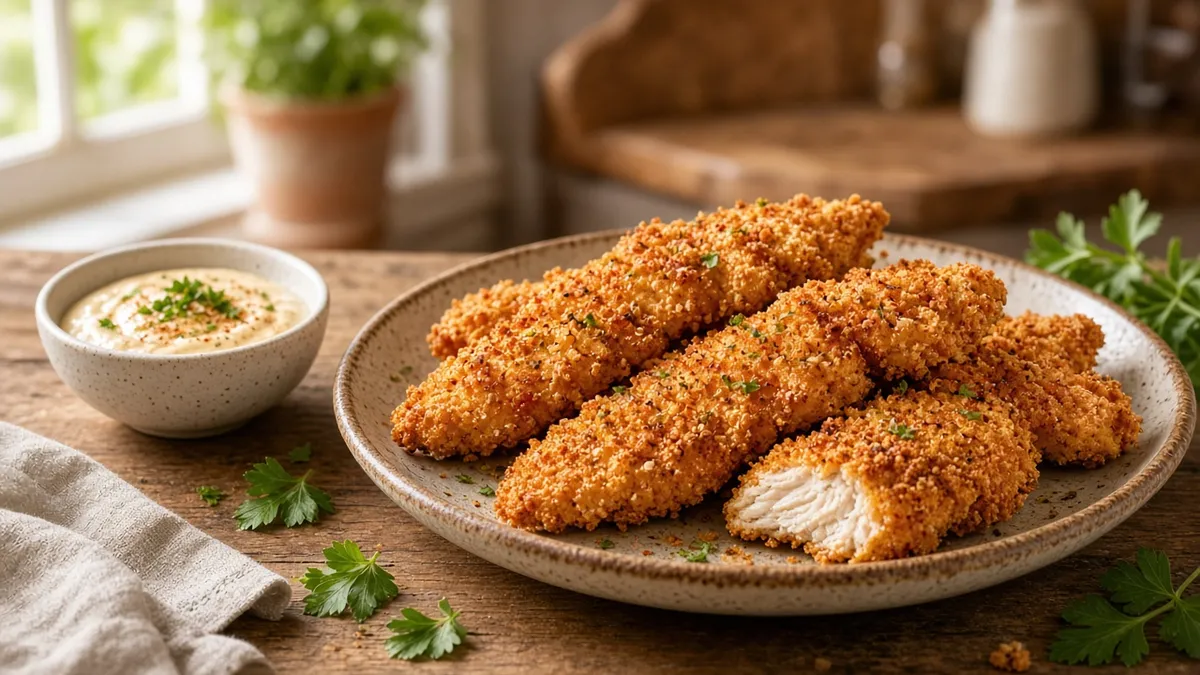
Recipe card
Print / PDFGrandma's Crispy Baked Chicken Tenders
Rate this recipe
Be the first to rate
- Prep Time
- 20 mins
- Cook Time
- 20 mins
- Total Time
- 40 mins
Ingredients
- 1 1/2 pounds chicken tenderloins
- 1 teaspoon fine salt
- 1/2 teaspoon black pepper
- 1/2 cup all-purpose flour
- 2 large eggs
- 2 tablespoons milk
- 1 1/2 cups panko breadcrumbs
- 1 teaspoon paprika
- 1/2 teaspoon garlic powder
- 1/2 teaspoon onion powder
- 2 tablespoons olive oil
Equipment
- Rimmed baking sheet — Use with a wire rack for crisp bottoms.
- Wire cooling rack — Choose an oven-safe rack that fits the baking sheet.
- Three shallow bowls — For the flour, egg mixture, and breadcrumb coating.
- Instant-read thermometer — Check that the chicken reaches 165°F.
- Paper towels — Use to pat the chicken dry before breading.
Method
- 1
Preheat the oven to 425°F.
- 2
Fit a wire rack over a rimmed baking sheet.
- 3
Pat the chicken tenderloins dry with paper towels.
- 4
Season the chicken with the salt and black pepper.
- 5
Place the flour in a shallow bowl.
- 6
Whisk the eggs and milk in a second shallow bowl.
- 7
Combine the panko, paprika, garlic powder, onion powder, and olive oil in a third shallow bowl.
- 8
Coat each chicken tender with flour.
- 9
Dip each floured tender into the egg mixture.
- 10
Press each tender into the seasoned panko mixture.
- 11
Arrange the coated tenders on the wire rack.
- 12
Bake the tenders until golden and the thickest piece reaches 165°F, about 18 to 22 minutes.
Kitchen pick
As an Amazon Associate I earn from qualifying purchases. If you buy through these links, we may earn a small commission at no extra cost to you. Affiliate disclosure
Notes
| Nutrient | Amount per Serving |
|---|---|
| Calories | 430 |
| Fat | 15g |
| Protein | 43g |
| Carbs | 31g |
Why You'll Love This Chicken Tenders Recipe
- These tenders bake up golden and crisp without deep frying.
- Simple pantry seasonings give every bite that familiar, comforting flavor.
- The tender chicken stays juicy beneath its crunchy coating.
- They are ready in about 40 minutes, making them just right for a busy evening.
- Kids and grown-ups can enjoy them with their favorite dipping sauces.
Ingredients
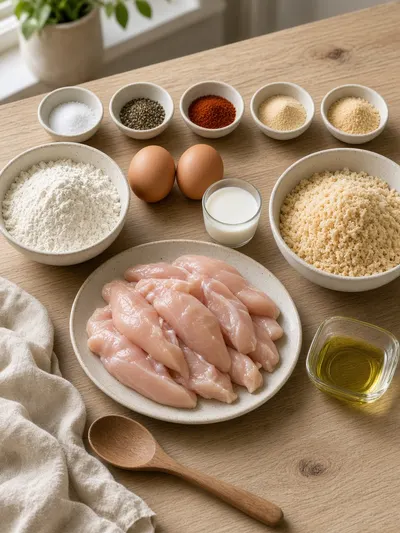
Gather your ingredients before you begin, and you will have a tidy little breading station ready to go. Each one has a cozy place in this simple chicken tenders recipe.
- Chicken tenderloins - 1 1/2 pounds
- Fine salt - 1 teaspoon
- Black pepper - 1/2 teaspoon
- All-purpose flour - 1/2 cup
- Large eggs - 2
- Milk - 2 tablespoons
- Panko breadcrumbs - 1 1/2 cups
- Paprika - 1 teaspoon
- Garlic powder - 1/2 teaspoon
- Onion powder - 1/2 teaspoon
- Olive oil - 2 tablespoons
How to Make Chicken Tenders Recipe
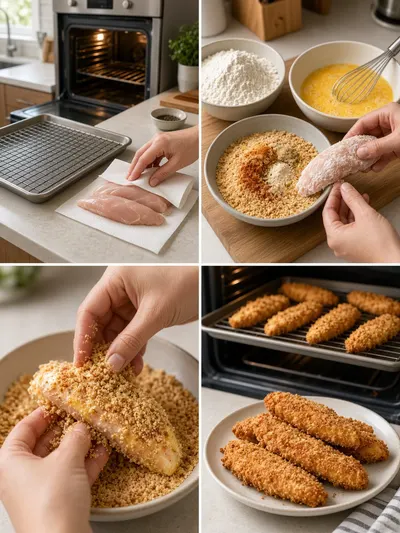
Plan on about 20 minutes of prep and 20 minutes of baking time. There is no extra resting time required, so these crisp tenders can move from the oven to the table while they are still warm.
Step 1: Preheat the Oven
Preheat the oven to 425°F so it is hot and ready when the tenders are coated. A properly heated oven helps the crumbs turn beautifully golden.
Step 2: Set Up the Baking Sheet
Fit a wire rack over a rimmed baking sheet. The rack lets hot air circulate around the chicken and helps the coating stay crisp.
Step 3: Dry the Chicken
Pat the chicken tenderloins dry with paper towels. Removing extra moisture helps the seasoning and coating cling to the chicken.
Step 4: Season the Chicken
Season the chicken tenderloins with the salt and black pepper. Turn them gently so the seasoning is spread over all sides.
Step 5: Add the Flour
Place the flour in a shallow bowl. This first coating gives the egg mixture something to hold onto.
Step 6: Whisk the Egg Mixture
Whisk the eggs and milk together in a second shallow bowl until smooth. Keep this bowl next to the flour for easy dipping.
Step 7: Prepare the Breadcrumbs
Combine the panko, paprika, garlic powder, onion powder, and olive oil in a third shallow bowl. Stir until the crumbs are evenly seasoned and lightly coated with oil.
Step 8: Coat with Flour
Coat each chicken tender with flour, turning it gently to cover all sides. Shake off any excess flour before moving to the egg mixture.
Step 9: Dip in Egg
Dip each floured tender into the egg mixture. Let the extra egg drip back into the bowl so the crumb coating will not become too heavy.
Step 10: Press into Panko
Press each tender into the seasoned panko mixture. Turn it and press again so the crumbs cover the chicken from end to end.
Step 11: Arrange on the Rack
Arrange the coated tenders on the wire rack, leaving a little space between them. Good airflow around each piece helps the coating brown evenly.
Step 12: Bake Until Done
Bake the tenders until golden and the thickest piece reaches 165°F, about 18 to 22 minutes. Cooking time can vary slightly with the size of the tenderloins, so check the thickest piece before serving.
Recipe Snapshot
| Feature | Details |
|---|---|
| Category/Course | Dinner |
| Cuisine | American |
| Prep Time | 20 minutes |
| Cook Time | 20 minutes |
| Extra Time | 0 minutes |
| Total Time | 40 minutes |
| Dietary | Contains gluten, dairy, and eggs |
| Serves | 4 |
| Best Served | Warm with your favorite dipping sauce |
Pro Tips for Making Chicken Tenders Recipe
Heavy aluminum half sheets for pastry, cookies, and even roasting. View on Amazon
- Use a wire rack so the hot oven air can reach the bottoms of the tenders.
- Keep one hand for the dry ingredients and one hand for the egg mixture to make breading less messy.
- Press the panko gently onto the chicken so the crumbs stay in place during baking.
- Leave space between the tenders rather than crowding them together.
- Check the thickest tender with an instant-read thermometer and remove the chicken when it reaches 165°F.
How to Serve Chicken Tenders Recipe
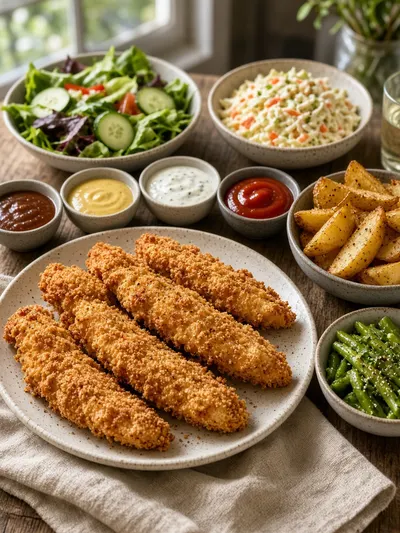
- Serve the warm tenders with barbecue sauce, honey mustard, ranch dressing, or ketchup.
- Add crisp salad greens, coleslaw, or sliced cucumbers for a fresh side.
- Pair them with oven-baked potatoes, sweet potato wedges, or buttered vegetables.
- Slice leftover tenders over a salad or tuck them into a soft dinner roll for an easy lunch.
Make Ahead and Storage
Storing Leftovers
- Let the tenders cool, then place them in a covered container and refrigerate within 2 hours.
- Refrigerate leftovers for up to 3 days.
- Keep dipping sauces in separate small containers so the coating stays crisp.
Freezing
- Cool the baked tenders completely before freezing them in a single layer.
- Once firm, transfer them to a freezer-safe container or bag and use within 2 months for the best quality.
- Freeze the tenders without sauce, since sauce can make the coating soft.
Reheating
- Reheat refrigerated or frozen tenders in a 400°F oven until hot throughout and crisp.
- Place them on a wire rack over a baking sheet for better airflow.
- For frozen tenders, allow extra heating time and check that the center is hot before serving.
Explore more easy breakfast recipes, quick lunch ideas, cozy dinner meals, tasty snacks, and delightful dessert.
Final Thoughts
There is something wonderfully comforting about a platter of golden chicken tenders waiting at the table. Keep this easy recipe close for family suppers, busy nights, and any time a little crispy comfort is in order.
FAQs
Here are a few helpful answers for making these homestyle baked chicken tenders.
Can I use regular breadcrumbs instead of panko?
Yes. Regular breadcrumbs will work, though panko gives the tenders a lighter, crunchier coating.
How do I keep the chicken tenders crisp?
Use the wire rack, avoid crowding the pieces, and serve them soon after baking. Keeping sauce on the side also helps the coating stay crisp.
Can I prepare the tenders ahead of time?
You can bread the chicken a short time ahead and keep it covered in the refrigerator until ready to bake. Bake the tenders until the thickest piece reaches 165°F.
What dipping sauces go well with baked chicken tenders?
Barbecue sauce, honey mustard, ranch dressing, ketchup, and a simple creamy garlic dip are all lovely choices.
Kitchen notes
Nutrition & sources
Calorie and nutrition figures on this page are estimates meant for general home-cooking guidance. Actual values vary with brands, portion size, and how the recipe is prepared.
Estimates draw on typical ingredient data from public nutrition databases such as the USDA FoodData Central. They are not a substitute for professional medical or dietary advice.
For how recipes are tested and when pages are updated, see How we test recipes. Full legal context lives in our disclaimers and affiliate disclosure.
Comments
Made this recipe? Share how it turned out for your family.
No comments yet — be the first to leave a note.