


Recipe card
Print / PDFEasy Homemade Biryani
Rate this recipe
Be the first to rate
- Prep Time
- 30 mins
- Cook Time
- 30 mins
- resting
- 10 mins
- Total Time
- 1 hr 10 mins
Ingredients
- 2 cups basmati rice (Washed and soaked for 30 minutes.)
- 500 g chicken (or your choice of meat/vegetables) (Cut into pieces.)
- 2 pieces onions (Sliced thinly.)
- 2 pieces tomatoes (Chopped.)
- 4 cloves garlic (Minced.)
- 1 inch ginger (Grated.)
- 1/2 cup yogurt (Plain.)
- 2 tbsp biryani masala (For authentic flavor.)
- 1 tsp turmeric powder (For color.)
- 1 tsp red chili powder (Adjust to spice preference.)
- 4 pods green cardamom (Whole.)
- 4 cloves cloves (Whole.)
- 1 stick cinnamon (Whole.)
- 2 leaves bay leaves (Whole.)
- a handful fresh mint leaves (Chopped.)
- a handful fresh coriander leaves (Chopped.)
- 3 tbsp ghee or oil (For cooking.)
- to taste salt (To enhance flavor.)
- 4 cups water (For cooking rice.)
Equipment
- 1 Large pot — For cooking the biryani.
- 1 Measuring cups — For measuring rice and water.
- 1 spoon — For stirring ingredients.
Method
- 1
Rinse the basmati rice under cold water until it runs clear. Soak it for 30 minutes to achieve that perfect texture.
- 2
Heat ghee or oil in a large pot. Add cardamom, cloves, cinnamon, and bay leaves. Sauté until aromatic and your kitchen smells heavenly.
- 3
Add sliced onions and cook until they turn golden brown. This step adds a lovely sweetness to your biryani.
- 4
Stir in minced garlic and ginger, cooking for 1 minute. Let those flavors mingle!
- 5
Add chopped tomatoes and cook until they soften. This will create a rich base for your biryani.
- 6
Stir in yogurt, biryani masala, turmeric, red chili powder, and salt. Cook until the oil separates, revealing those vibrant colors.
- 7
Add chicken or your chosen protein/vegetables. Coat them with the spices and cook for 5–7 minutes until they’re well combined.
- 8
Drain the soaked rice and add it to the pot. Gently mix everything together, being careful not to break the rice.
- 9
Pour in water, bring to a boil, then reduce heat to low. Cover and simmer for 15–20 minutes until the rice is tender and fluffy.
- 10
Turn off the heat and let the biryani rest, covered, for 10 minutes. This step allows the flavors to meld beautifully.
- 11
Garnish with fresh mint and coriander leaves before serving. Enjoy your homemade biryani with joy!
Notes
| Nutrient | Amount per Serving |
|---|---|
| Nutrition Facts | Per Serving |
| Calories | 450 |
| Fat | 15g |
| Protein | 25g |
| Carbs | 55g |
Why You’ll Love This biryani
- Rich layers of spices create a symphony of flavors.
- Perfect for family gatherings or cozy dinners.
- Customizable with your favorite proteins or veggies.
- One-pot wonder that saves time on cleanup.
- Hearty and satisfying, it’s comfort food at its best!
Ingredients
Here’s everything you need to make a delicious homemade biryani!
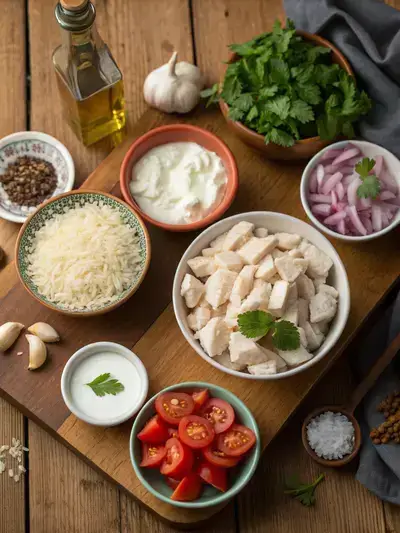
- 2 cups basmati rice – washed and soaked for 30 minutes
- 500g chicken (or your choice of meat/vegetables) – cut into pieces
- 2 onions – sliced thinly
- 2 tomatoes – chopped
- 4 cloves garlic – minced
- 1-inch ginger – grated
- 1/2 cup yogurt – plain
- 2 tbsp biryani masala – for authentic flavor
- 1 tsp turmeric powder – for color
- 1 tsp red chili powder – adjust to spice preference
- 4 green cardamom pods – whole
- 4 cloves – whole
- 1 cinnamon stick – whole
- 2 bay leaves – whole
- a handful fresh mint leaves – chopped
- a handful fresh coriander leaves – chopped
- 3 tbsp ghee or oil – for cooking
- salt to taste – to enhance flavor
- 4 cups water – for cooking rice
How to Make Biryani
This delightful South Asia recipe takes about 30 minutes to prepare, 30 minutes to cook, and an additional 10 minutes to rest. Get ready for a flavorful journey!
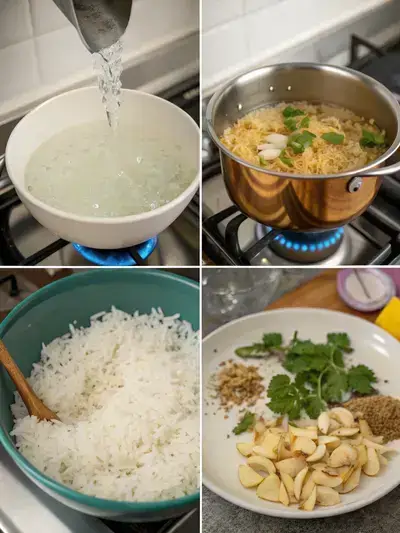
Step 1: Rinse the Rice
Rinse the basmati rice under cold water until it runs clear. Soak it for 30 minutes to achieve that perfect texture.
Step 2: Sauté Spices
Heat ghee or oil in a large pot. Add cardamom, cloves, cinnamon, and bay leaves. Sauté until aromatic and your kitchen smells heavenly.
Step 3: Cook Onions
Add sliced onions and cook until they turn golden brown. This step adds a lovely sweetness to your biryani.
Step 4: Add Garlic and Ginger
Stir in minced garlic and ginger, cooking for 1 minute. Let those flavors mingle!
Step 5: Incorporate Tomatoes
Add chopped tomatoes and cook until they soften. This will create a rich base for your biryani.
Step 6: Mix in Yogurt and Spices
Stir in yogurt, biryani masala, turmeric, red chili powder, and salt. Cook until the oil separates, revealing those vibrant colors.
Step 7: Add Protein or Vegetables
Add chicken or your chosen protein/vegetables. Coat them with the spices and cook for 5–7 minutes until they’re well combined.
Step 8: Combine Rice
Drain the soaked rice and add it to the pot. Gently mix everything together, being careful not to break the rice.
Step 9: Cook the Biryani
Pour in water, bring to a boil, then reduce heat to low. Cover and simmer for 15–20 minutes until the rice is tender and fluffy.
Step 10: Let it Rest
Turn off the heat and let the biryani rest, covered, for 10 minutes. This step allows the flavors to meld beautifully.
Step 11: Garnish and Serve
Garnish with fresh mint and coriander leaves before serving. Enjoy your homemade biryani with joy!
Recipe Snapshot
| Feature | Details |
|---|---|
| Category | Main Course |
| Cuisine | Indian |
| Prep Time | 30 minutes |
| Cook Time | 30 minutes |
| Extra Time | 10 minutes (resting) |
| Total Time | 70 minutes |
| Dietary | Non-Vegetarian |
| Serves | 4 |
| Best Served | Warm with fresh herbs! |
Pro Tips for Making biryani
- Soak the rice for at least 30 minutes for perfect texture.
- Use fresh spices for a more vibrant flavor.
- Layer the ingredients gently to maintain the structure.
- Let the biryani rest after cooking for deeper flavors.
- Experiment with different proteins or vegetables for variety.
How to Serve this biryani
- Serve with a side of cooling raita made from yogurt, cucumber, and mint.
- Pair with crispy papadums for a delightful crunch.
- Enjoy with a tangy salad of onions, tomatoes, and lemon juice.
- Complement with a warm naan or paratha for a hearty meal.
- Drizzle with a bit of saffron-infused milk for an extra touch of luxury.
- Garnish with fresh cilantro and fried onions for added flavor and texture.
Make Ahead and Storage
Storing and enjoying your biryani later is easy and convenient:
Storing Leftovers
- Allow biryani to cool to room temperature.
- Transfer to an airtight container.
- Store in the refrigerator for up to 3 days.
- Label the container with the date for easy tracking.
Freezing
- Cool the biryani completely before freezing.
- Portion into freezer-safe containers or bags.
- Remove excess air to prevent freezer burn.
- Freeze for up to 3 months for best quality.
Reheating
- Thaw frozen biryani in the refrigerator overnight.
- Reheat in a microwave or on the stovetop.
- Add a splash of water or broth to maintain moisture.
- Heat until steaming hot, stirring occasionally.
Explore more easy breakfast recipes, quick lunch ideas, cozy dinner meals, tasty snacks, and delightful dessert.
Final Thoughts
Now that you have this easy homemade biryani recipe, it’s time to gather your loved ones and savor the delightful flavors! Cooking this dish is not just about the ingredients; it’s about the memories you create. So, roll up your sleeves, enjoy the process, and relish every bite of this aromatic dish. Happy cooking!
Quick answers
Frequently asked questions
Straight answers from the kitchen — storage, swaps, and common sticking points for this recipe.
What does biryani taste like?
What does biryani consist of?
Is biryani just curry and rice?
Is biryani healthy or unhealthy?
Kitchen notes
Nutrition & sources
Calorie and nutrition figures on this page are estimates meant for general home-cooking guidance. Actual values vary with brands, portion size, and how the recipe is prepared.
Estimates draw on typical ingredient data from public nutrition databases such as the USDA FoodData Central. They are not a substitute for professional medical or dietary advice.
For how recipes are tested and when pages are updated, see How we test recipes. Full legal context lives in our disclaimers and affiliate disclosure.


Comments
Made this recipe? Share how it turned out for your family.
No comments yet — be the first to leave a note.