
fruit roll ups are your new favorite snack, bursting with sun-ripened strawberries, juicy peaches, and a drizzle of sweet honey. Imagine transforming bright red berries into a velvety puree, swirling in a dash of tangy lemon juice, then gently drying them into chewy ribbons. Each bite is like a sunny picnic in your mouth, leaving you craving more. Crafted with love and a sprinkle of nostalgia, this playful recipe invites you to relive childhood joys while savoring wholesome ingredients. No added preservatives or sneaky sugars—just nature’s candy, made your way. Ready to roll up some fun and flavor? Let’s get started!
Table of Contents
Why You’ll Love This fruit roll ups
- They’re a fun and healthy snack for all ages.
- Customizable flavors to suit your taste buds.
- Easy to make with just a few simple ingredients.
- Perfect for on-the-go munching or lunchboxes.
- A great way to use up overripe fruits!

fruit roll ups
Ingredients
Equipment
Method
- Step 1: Preheat your oven to 140°F (60°C) or set your food dehydrator to low.
- Step 2: In a blender, combine your favorite fruit puree, sugar, lemon juice, fruit pectin, and a pinch of salt. Blend until smooth and creamy.
- Step 3: Pour the blended mixture into a saucepan. Cook over medium heat for 5–7 minutes, stirring constantly until it thickens slightly.
- Step 4: Line a baking sheet with parchment paper. Pour the cooked fruit puree onto it, spreading it evenly into a thin layer about 1/16 inch thick.
- Step 5: Place the baking sheet in the oven or dehydrator. Dry for 4–6 hours, or until the fruit leather is no longer sticky but still pliable.
- Step 6: Remove the fruit leather from the heat and let it cool completely. Use kitchen scissors or a pizza cutter to slice it into strips.
- Step 7: Tightly roll each strip with the parchment paper backing. Store your fruit roll ups in an airtight container at room temperature for up to 2 weeks.
Notes
| Nutrient | Amount per Serving |
|---|---|
| Calories | 100 |
| Fat | 0g |
| Protein | 1g |
| Carbs | 25g |
| Sugar | 20g |
Ingredients
Gather these simple ingredients to make delicious fruit roll ups at home!
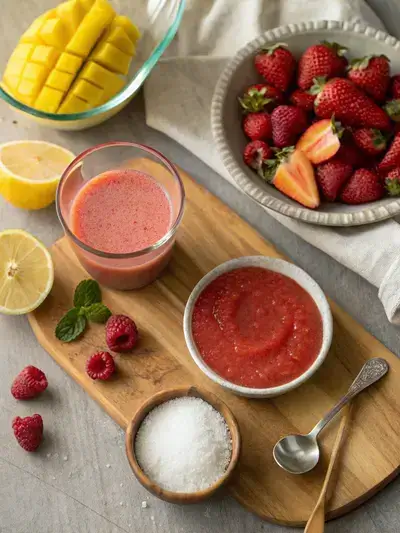
- 2 cups mixed fruit puree – strawberries, raspberries, or mango
- ¼ cup granulated sugar – for sweetness
- 1 tablespoon lemon juice – adds tanginess
- 1 teaspoon fruit pectin – helps with consistency
- Pinch of salt – enhances flavor
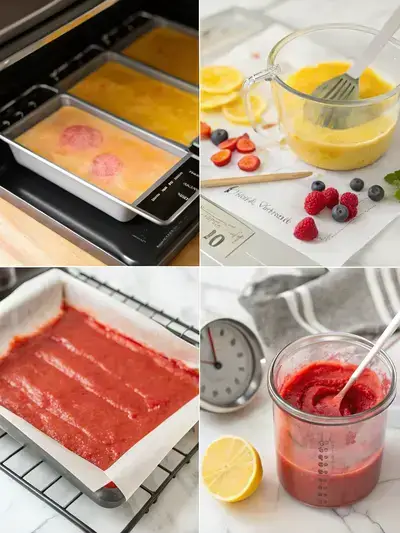
How to Make fruit roll ups
Making fruit roll ups is a fun and rewarding process! With a preparation time of about 15 minutes, cooking time of 5–7 minutes, and drying time of 4–6 hours, you’ll have delicious homemade snacks ready to enjoy. Let’s get started!
Step 1: Preheat the Oven
Preheat your oven to 140°F (60°C) or set your food dehydrator to low.
Step 2: Blend the Ingredients
In a blender, combine your favorite fruit puree, sugar, lemon juice, fruit pectin, and a pinch of salt. Blend until smooth and creamy.
Step 3: Cook the Mixture
Pour the blended mixture into a saucepan. Cook over medium heat for 5–7 minutes, stirring constantly until it thickens slightly.
Step 4: Prepare the Baking Sheet
Line a baking sheet with parchment paper. Pour the cooked fruit puree onto it, spreading it evenly into a thin layer about 1/16 inch thick.
Step 5: Dry the Fruit Leather
Place the baking sheet in the oven or dehydrator. Dry for 4–6 hours, or until the fruit leather is no longer sticky but still pliable.
Step 6: Cool and Cut
Remove the fruit leather from the heat and let it cool completely. Use kitchen scissors or a pizza cutter to slice it into strips.
Step 7: Roll and Store
Tightly roll each strip with the parchment paper backing. Store your fruit roll ups in an airtight container at room temperature for up to 2 weeks.
Recipe Snapshot
| Feature | Details |
|---|---|
| Category | snack |
| Cuisine | American |
| Prep Time | 15 minutes |
| Cook Time | 7 minutes |
| Extra Time | 240 minutes (drying) |
| Total Time | 262 minutes |
| Dietary | Vegetarian |
| Serves | 10 |
| Best Served | At room temperature, as a healthy snack! |
Pro Tips for Making fruit roll ups
- Choose ripe, sweet fruits for the best flavor.
- Blend fruits until smooth for a uniform texture.
- Spread the mixture evenly on the tray for consistent drying.
- Check for doneness by feeling the texture; it should be tacky but not sticky.
- Store in an airtight container to keep them fresh longer.
How to Serve this fruit roll ups
- Enjoy as a quick snack on the go.
- Pair with yogurt for a delicious breakfast treat.
- Serve with a side of nut butter for a protein boost.
- Use as a fun topping for ice cream or smoothie bowls.
- Cut into strips and add to lunchboxes for a fruity surprise.
- Mix with granola for a crunchy, chewy snack mix.
Make Ahead and Storage
Storing your homemade fruit roll ups is simple and keeps them fresh for later enjoyment:
Storing Leftovers
- Allow fruit roll ups to cool completely before storing.
- Wrap each roll up in parchment paper or plastic wrap.
- Place wrapped roll ups in an airtight container.
- Store in a cool, dry place for up to one week.
Freezing
- Wrap each roll up tightly in plastic wrap.
- Place wrapped roll ups in a freezer-safe bag or container.
- Label with the date and freeze for up to six months.
- Thaw in the refrigerator before enjoying.
Reheating
- Reheat in a microwave for 5-10 seconds if desired.
- Check for warmth; avoid overheating to maintain texture.
- Enjoy at room temperature for the best flavor.
- Pair with yogurt or fresh fruit for a tasty snack.
Explore more easy breakfast recipes, quick lunch ideas, cozy dinner meals, tasty snacks, and delightful dessert.
FAQs
Here’s a helpful FAQ about this recipe:
1. Are Fruit Roll-Ups healthy?
Fruit Roll-Ups can be a fun snack, but they are often high in sugar and low in fiber. If you’re looking for a healthier option, consider making your own at home using fresh fruit and natural sweeteners. This way, you can control the ingredients and make a more nutritious version that still satisfies your sweet tooth!
2. When were Fruit Roll-Ups discontinued?
Fruit Roll-Ups have not been discontinued; they are still available in stores today. However, there have been various flavors and packaging changes over the years. If you’re looking for a specific flavor, it might be worth checking online or at specialty stores!
3. Are Fruit Roll-Ups and Fruit by the Foot the same brand?
Fruit Roll-Ups and Fruit by the Foot are both produced by General Mills, but they are different products. Fruit Roll-Ups are flat and come in a roll, while Fruit by the Foot is a longer, thinner strip that you can unroll. Both are fun snacks, but they offer different textures and experiences!
4. What company makes Fruit Roll-Ups?
Fruit Roll-Ups are made by General Mills, a well-known company that produces a variety of snacks and cereals. They have been a popular choice for kids and adults alike for many years, and their fun flavors and textures keep people coming back for more!
Final Thoughts
Making your own fruit roll ups is not just simple; it’s a delightful trip down memory lane! With just a few ingredients, you can create a tasty treat that’s perfect for snacking or sharing. So gather your favorite fruits, get creative, and enjoy the sweet rewards of your homemade goodness. Happy rolling!